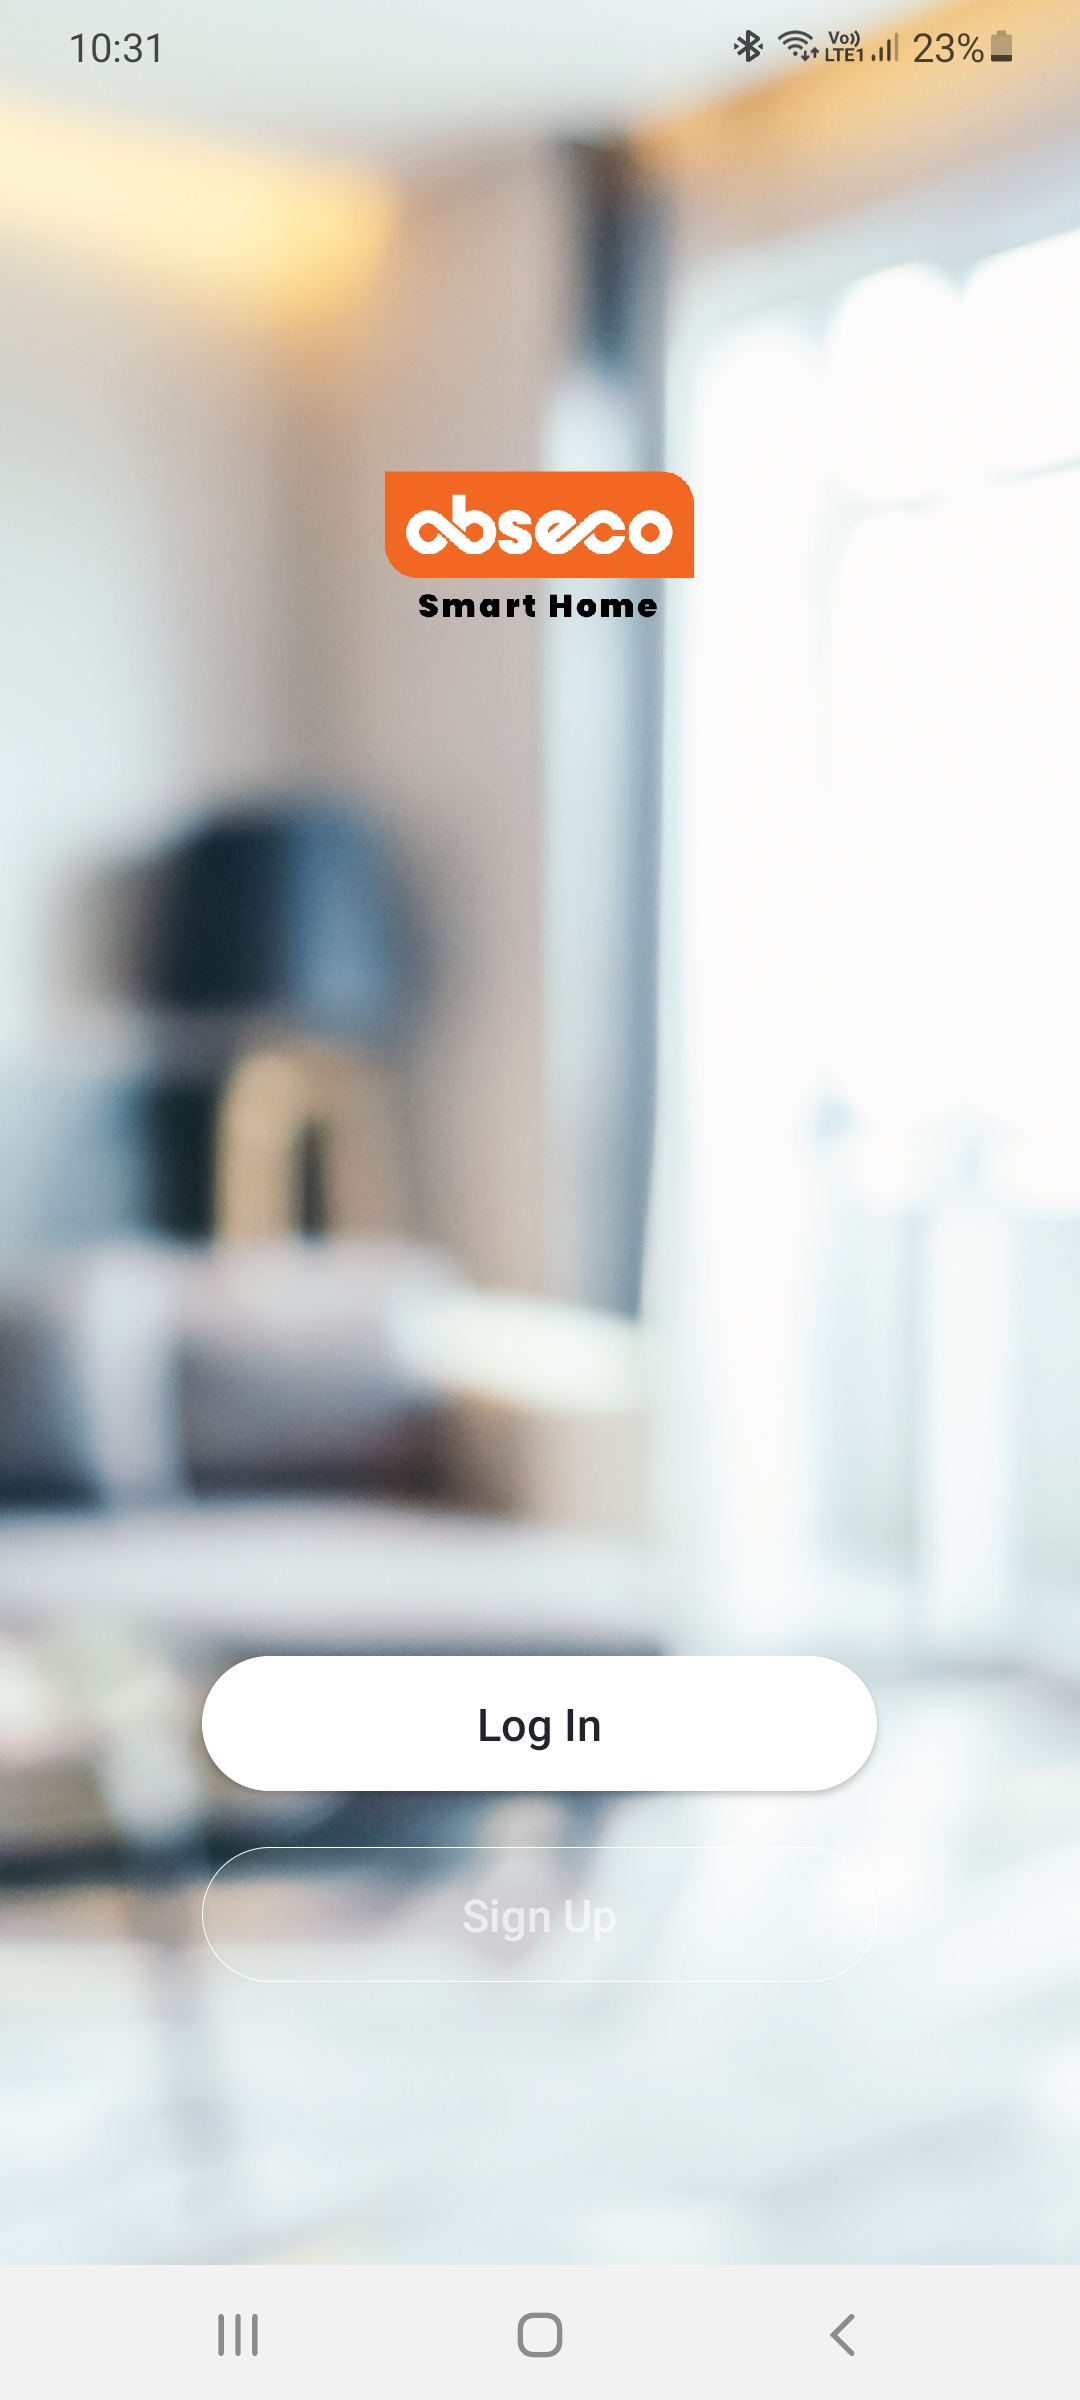
Abseco
Help Center
Welcome to the FAQ and Help Center for Abseco. Hopefully this guide can help you to solve any problems you are experiencing. Before using the guide,please ensure your device settings correctly follow the instructions in the User Guide.
Getting Started
Learn how to get your Abseco devices up and running.
Introduction
Abseco® AFi Series Smart Switch module is an innovative, futuristic and affordable smart
automation device which give users total control of their lights, appliances and electrical
outlets through various control methods such as smartphones, voice assistants, network
profiles, and cloud services such as IFTTT.
Our smart-touch solution provides a comprehensive automated home or business
electrical control ecosystem, offering users unparalleled levels of control and visibility
over their home or business lighting, heating, and cooling systems, all delivered in one
affordable, accessible, and easy-to-use package.
Install Your Abseco Smart Device
Learn how to install your Abseco smart devie
AFi One Switch
AFi Two Switch
AFi Three Switch
AFi Bell Switch
AFi Bell + Light Switch
AFi Smart Fan Regulator
AFi 32A DP Switch
AFi Smart Dimmer
AFi Six Switch
AFi Smart Power Outlet with Switch
AFi Smart Power Outlet without Switch
AFi Smart Composite Module
AFi Smart Power Outlet with Switch 6 Module
Installing Abseco App
Open Google Play Store or Apple Store,
then search for Abseco App and install
it.
User Registration
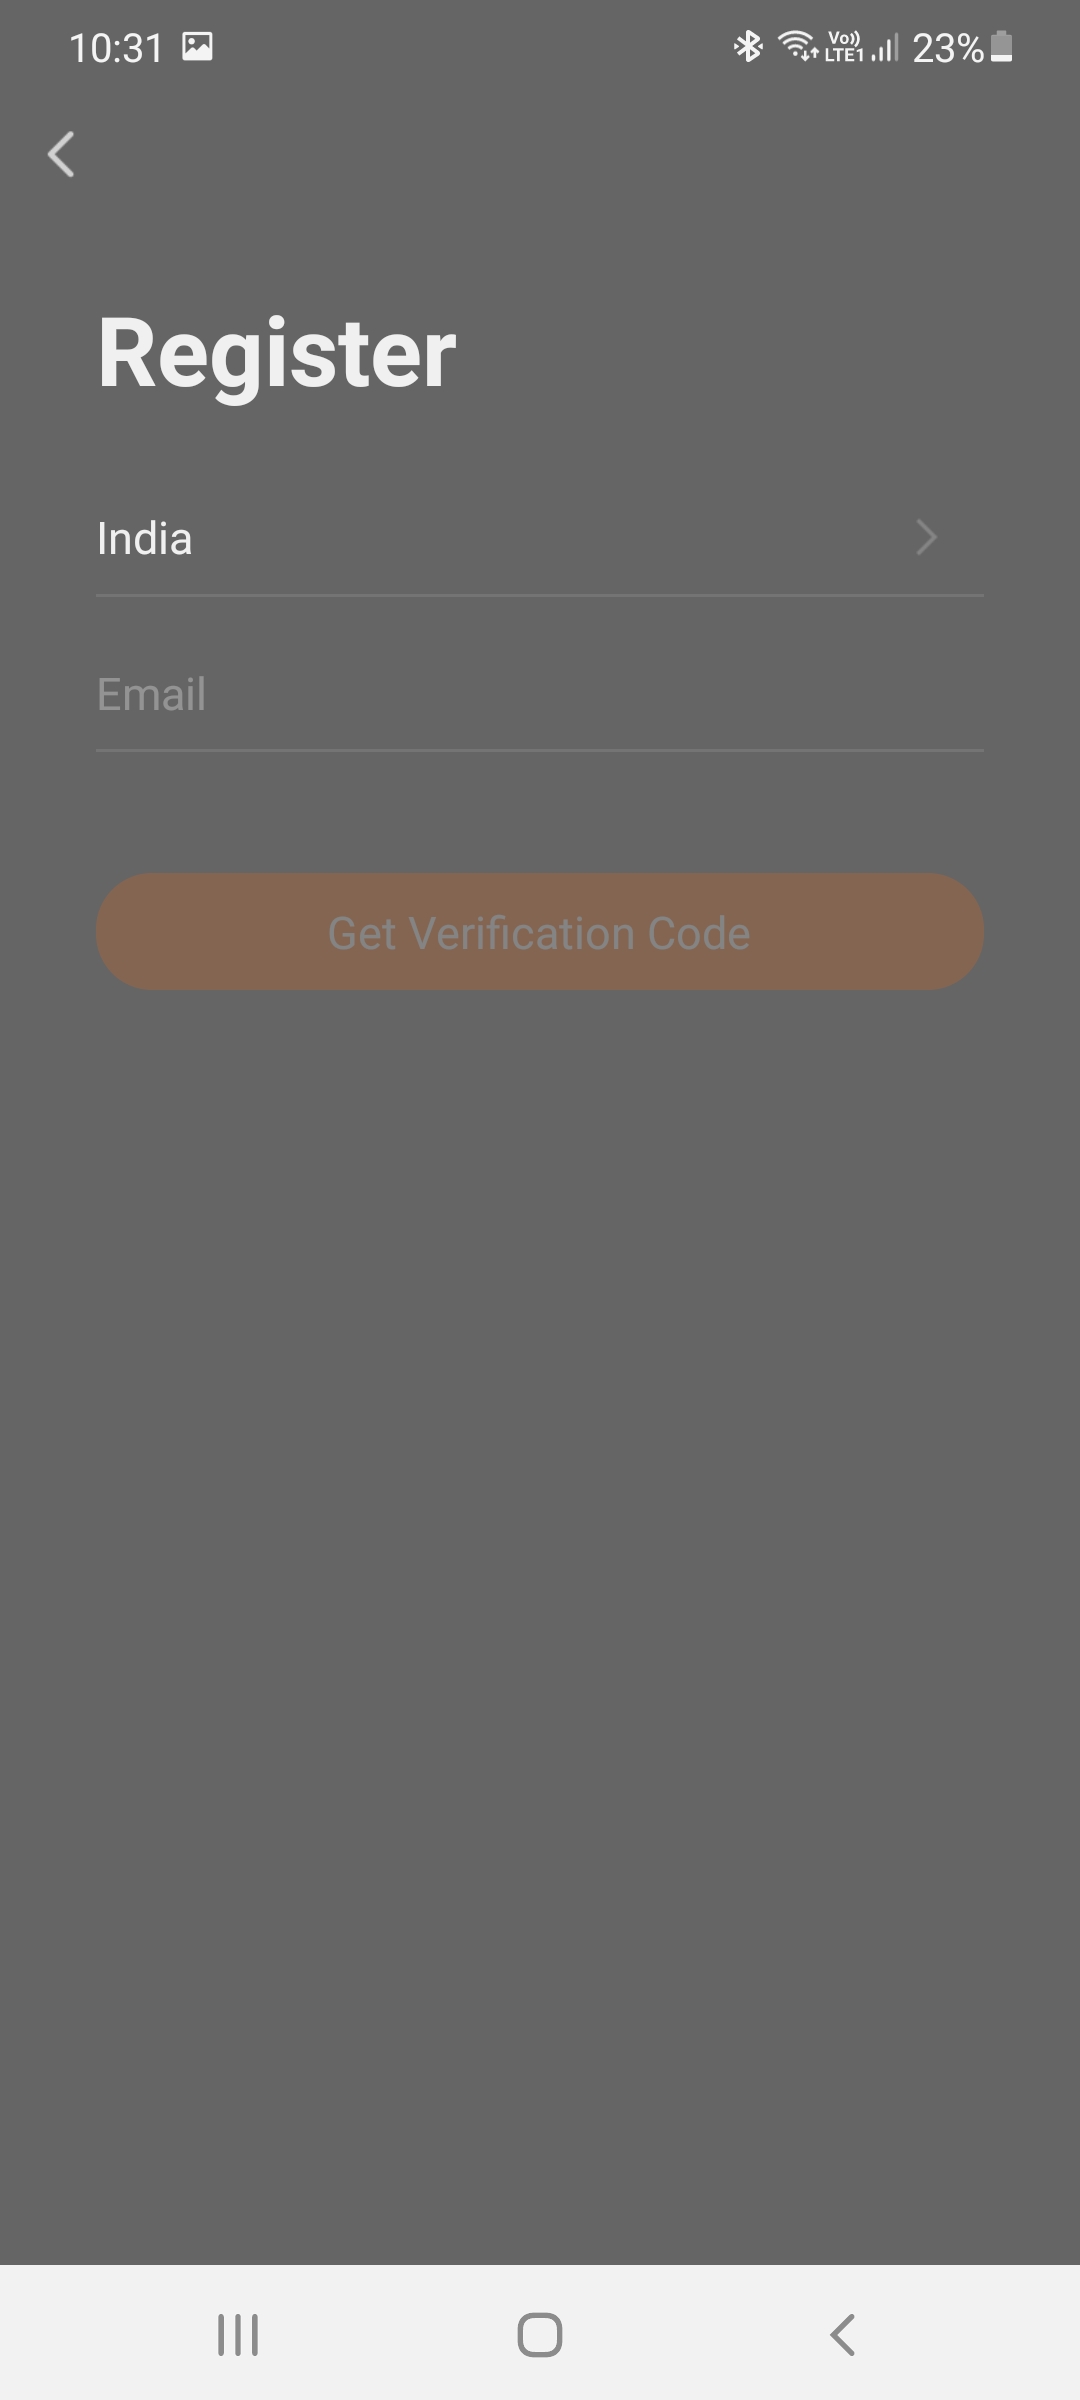
Open the Abseco App and select “Sign Up” option.
You will be presented with a User Agreement and Privacy Policy screen. Read the
user agreement and privacy policy and select “Agree” to continue to the user
registration screen.
To register yourself on the App, select your country from the selection field and
enter a valid email address or mobile number and select “Get Verification Code”.
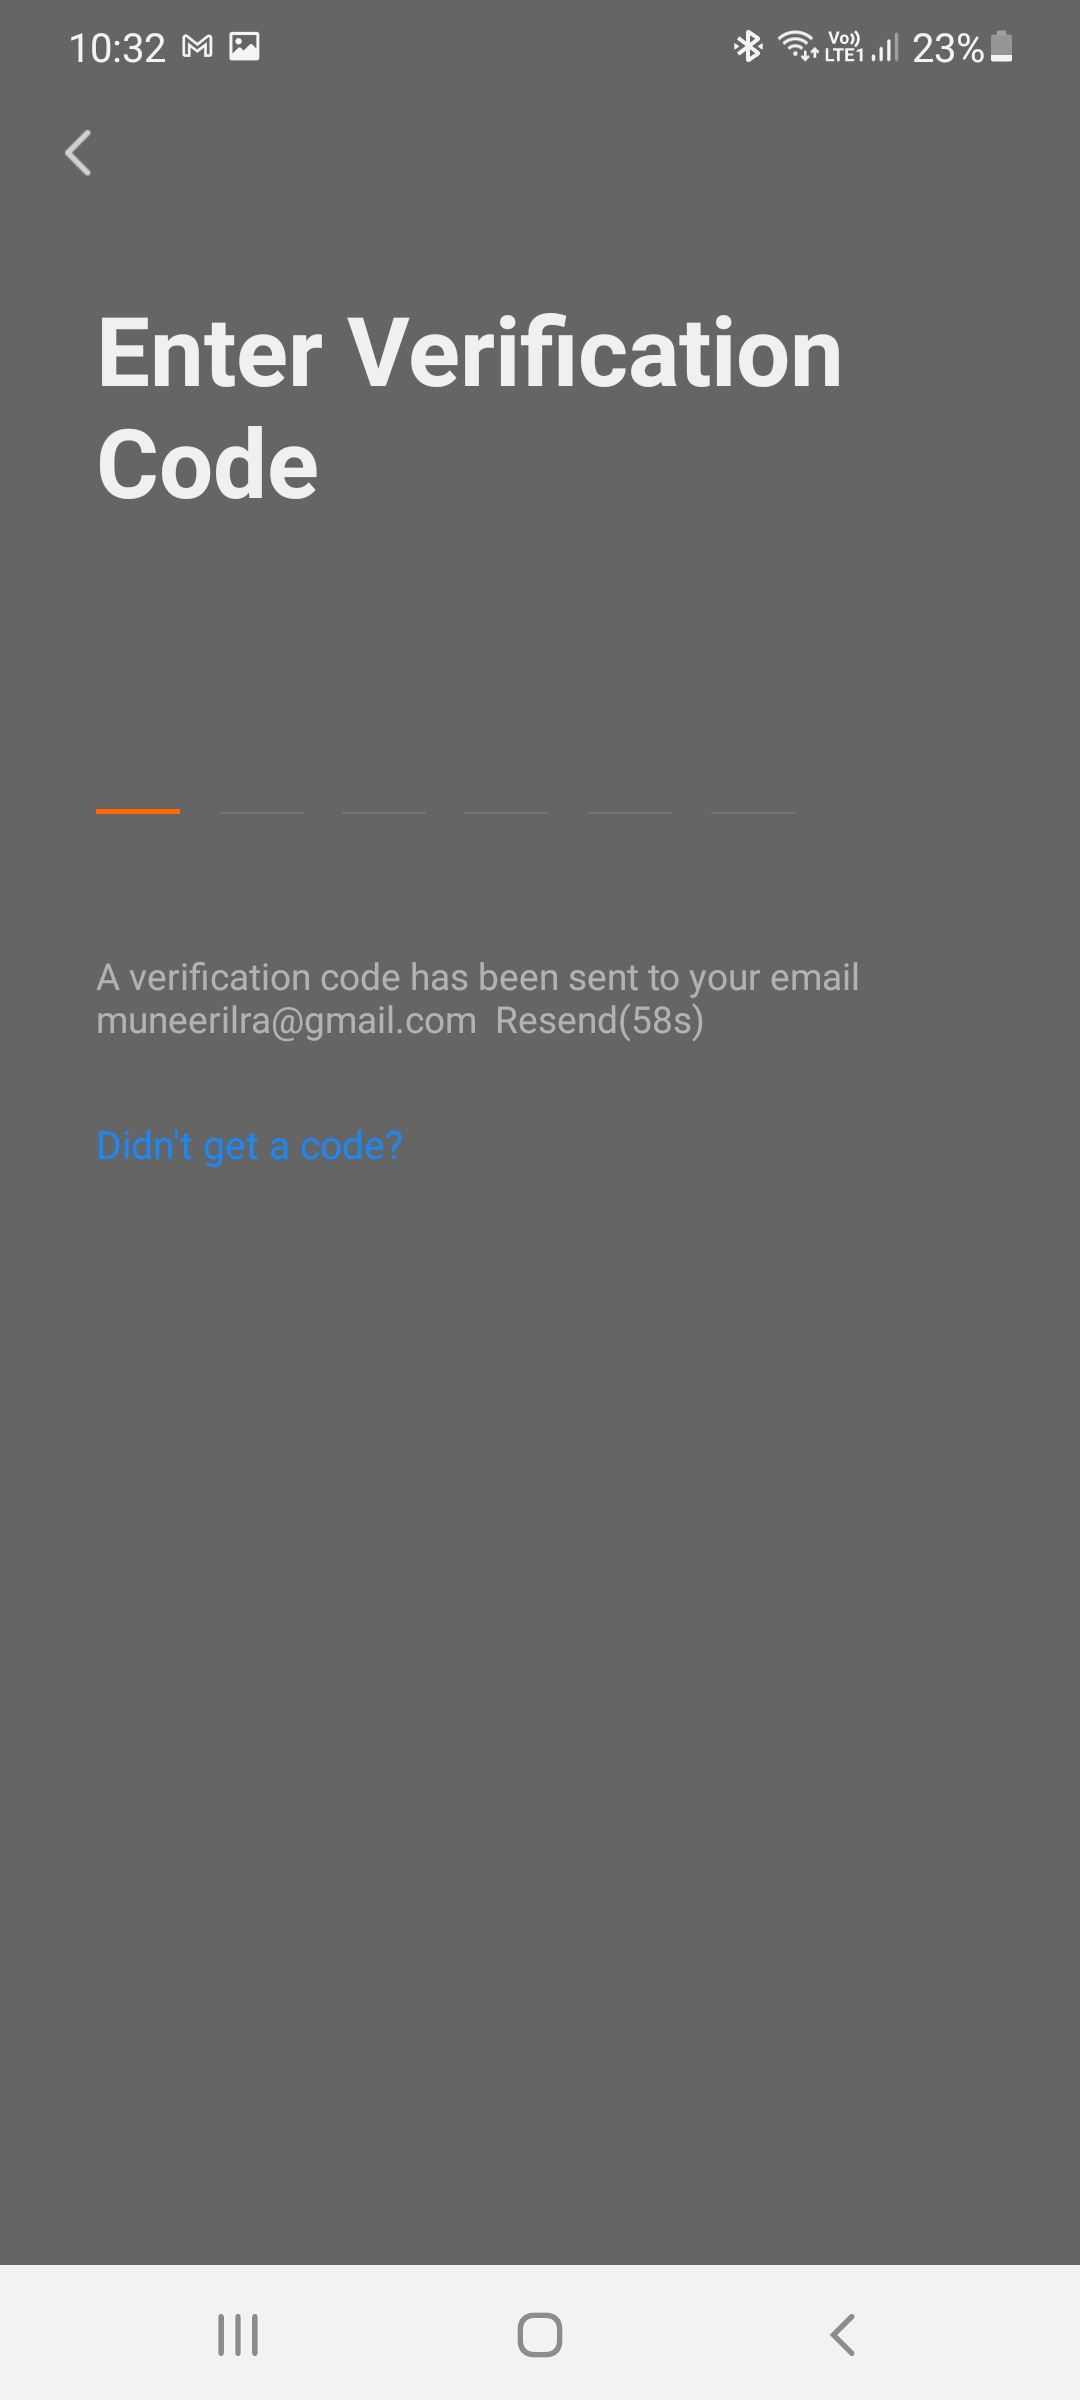
You will now receive a verification code on email/mobile number.
NOTE: Country/region once set during registration cannot be changed.
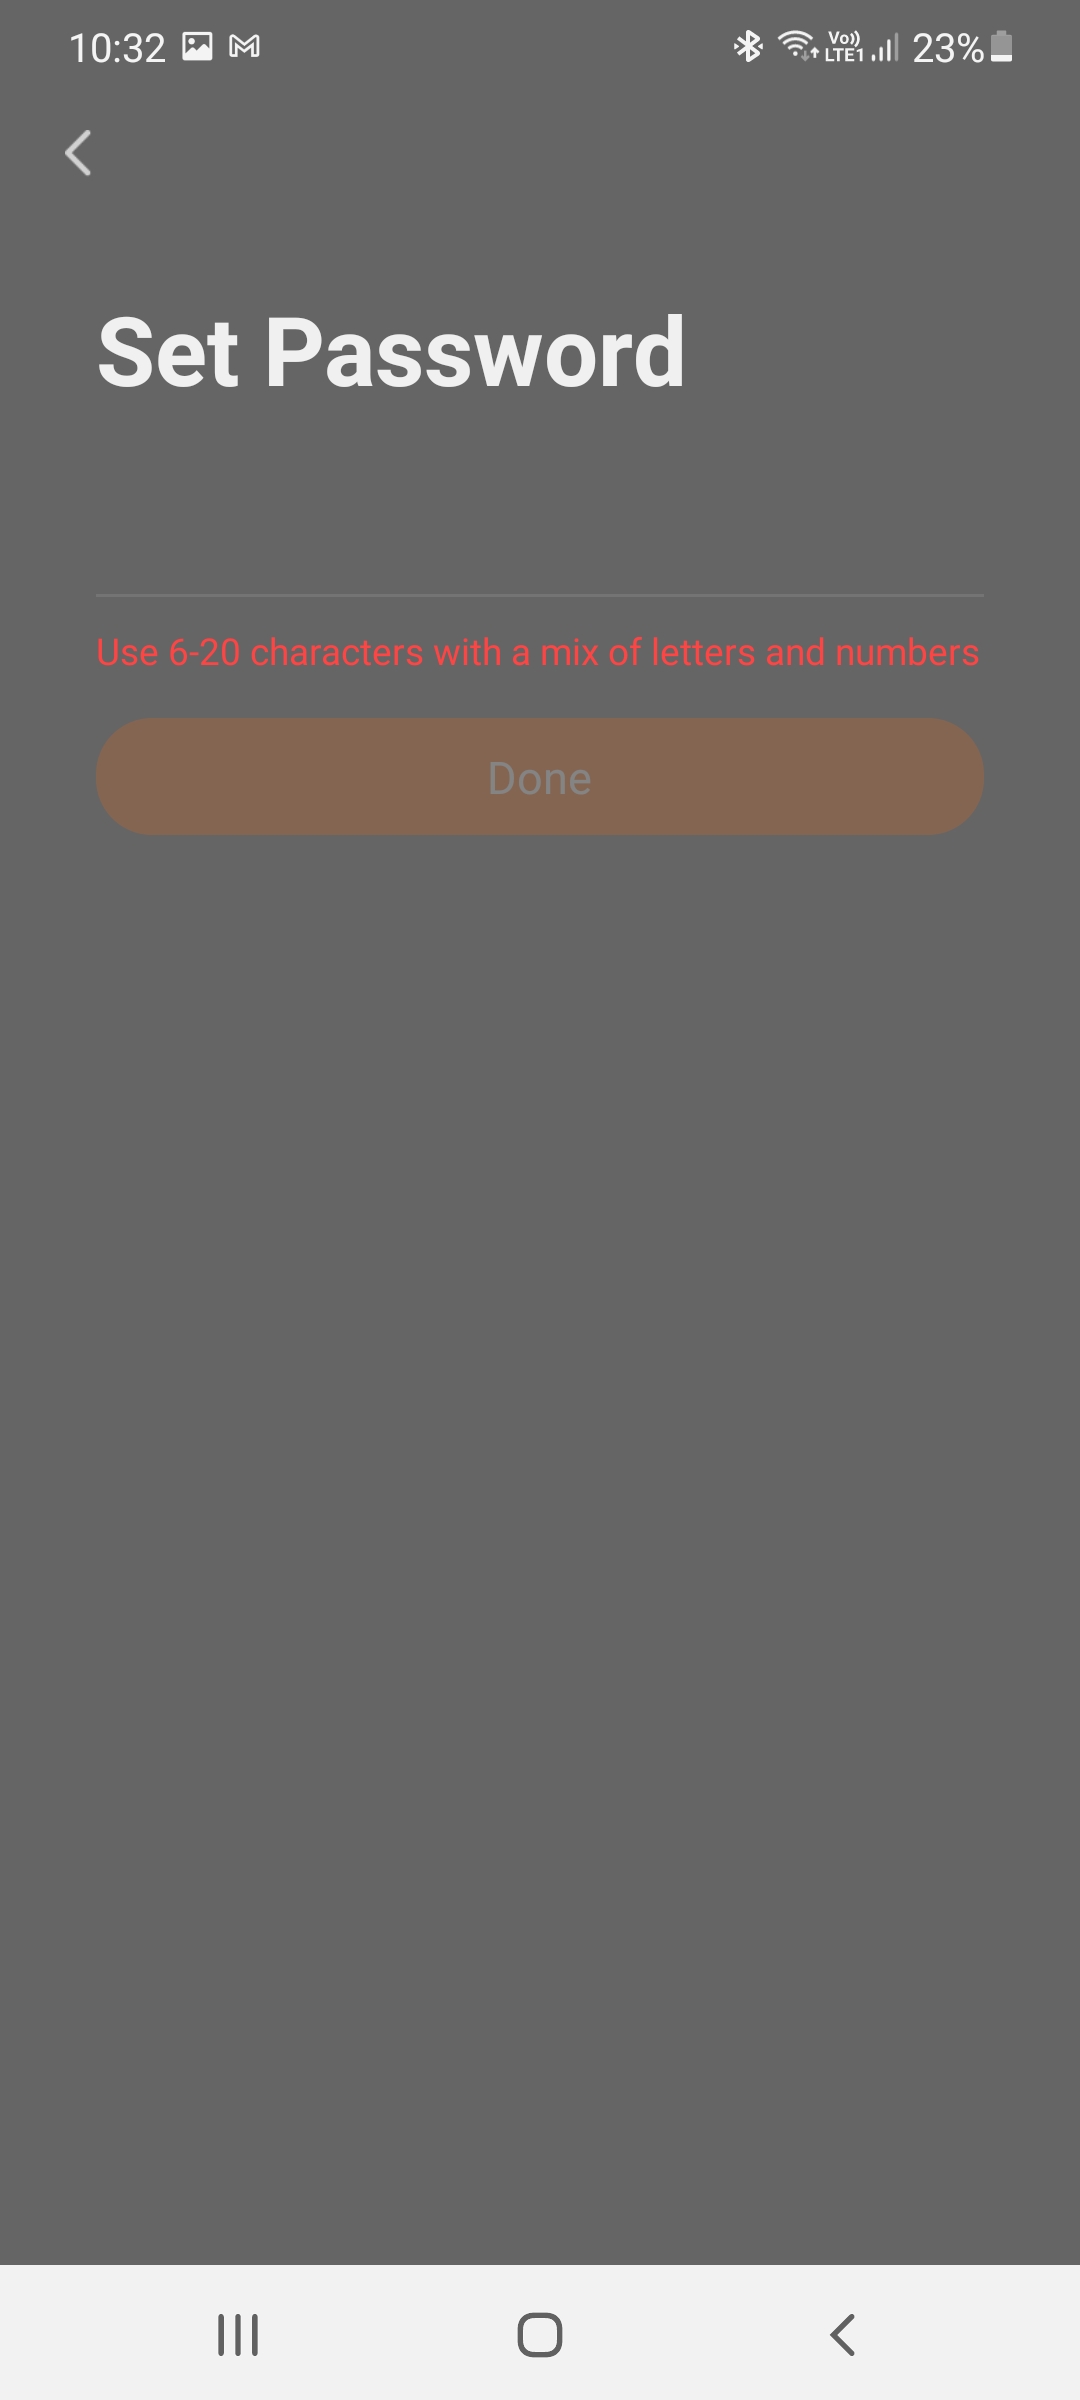
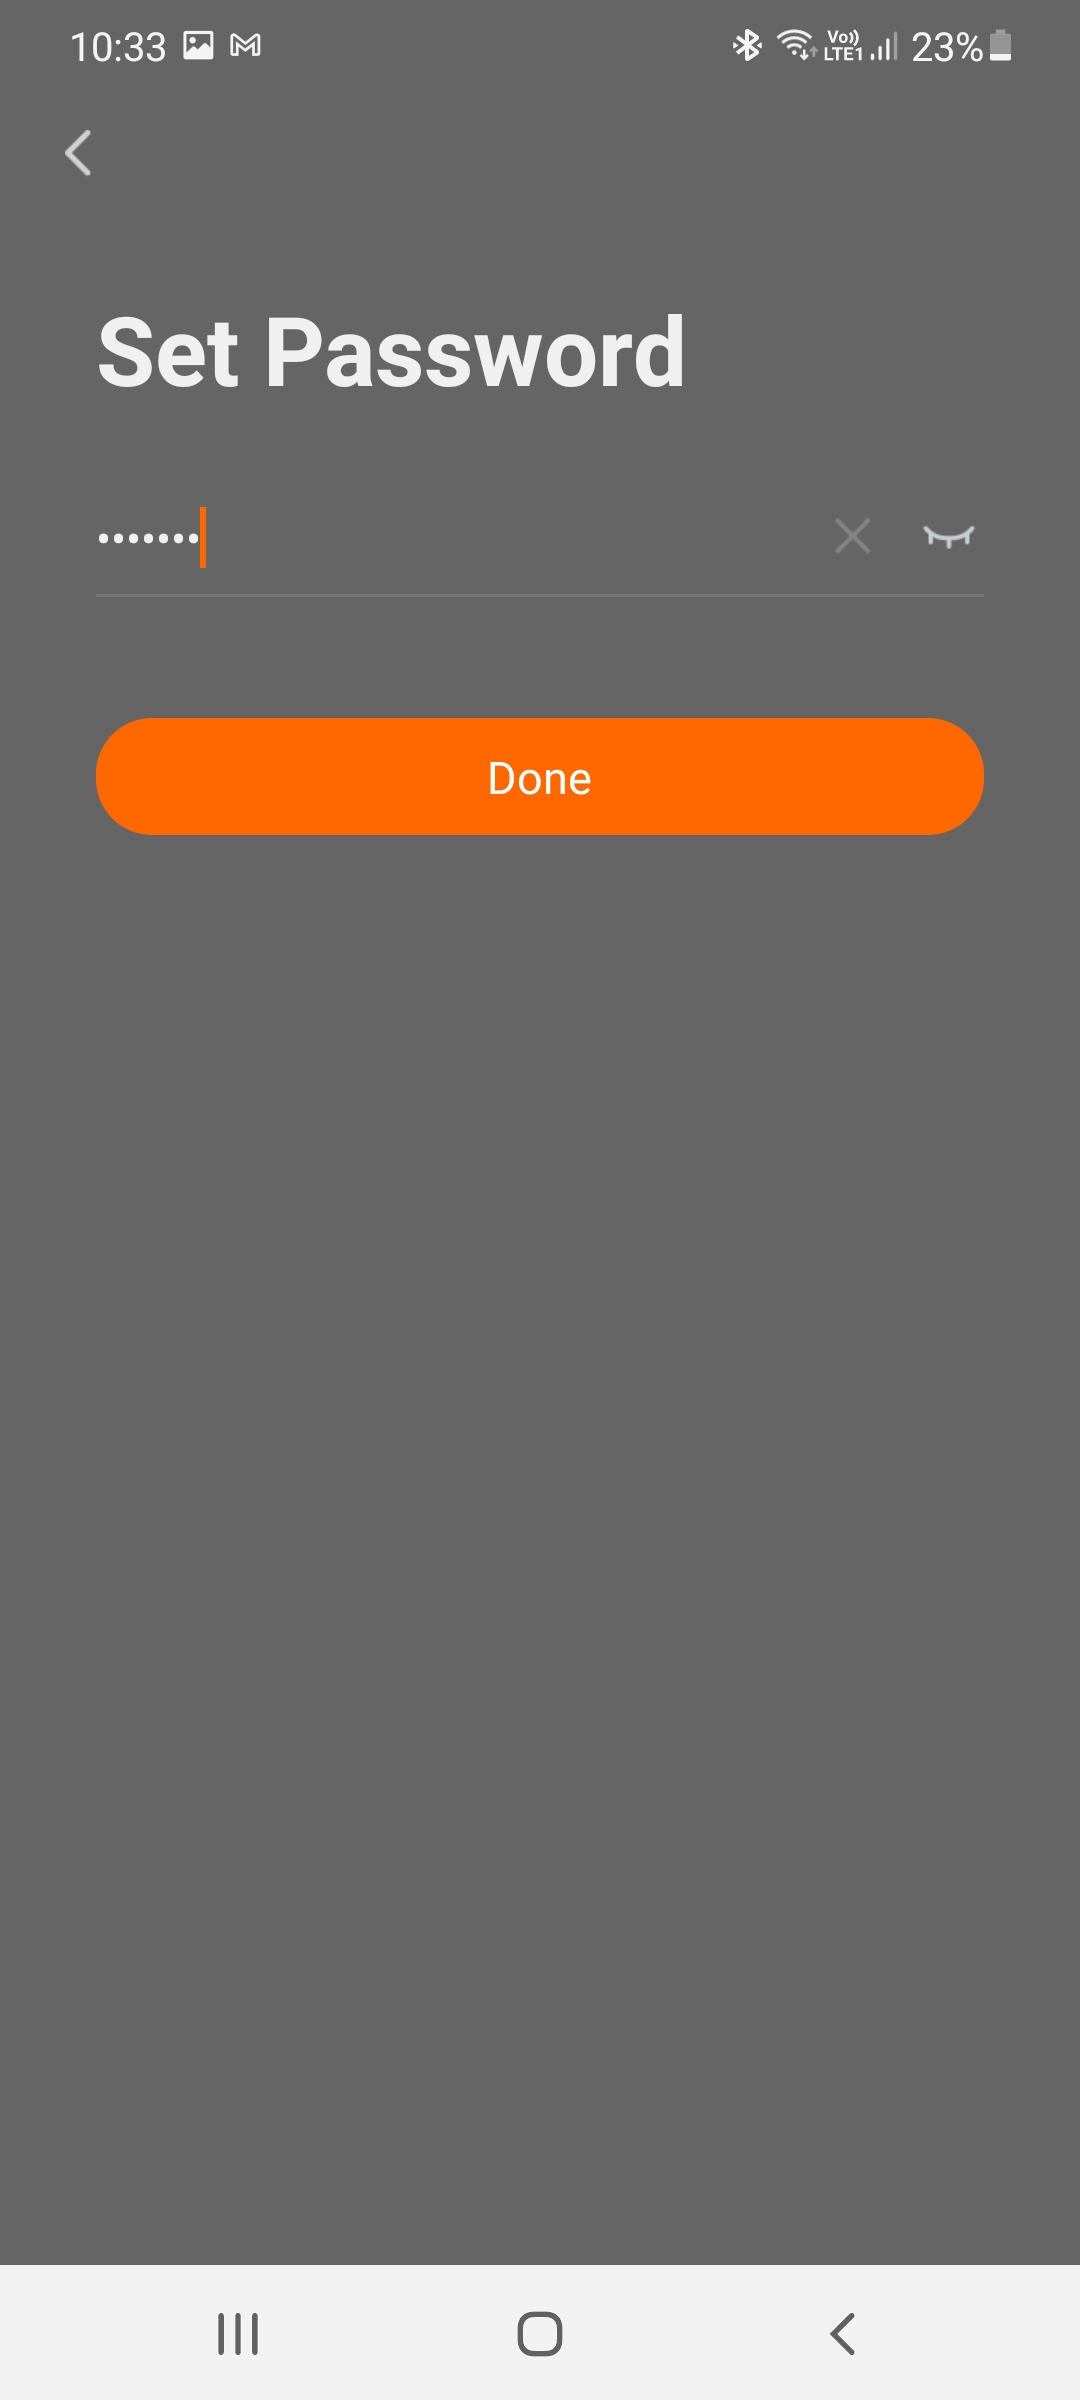
Enter the verification code and if the
code is correct, you will be presented
with Set Password screen. Set your
desired password and select “Done”.
NOTE: Password should contain
6 - 20 alpha-numeric
characters.
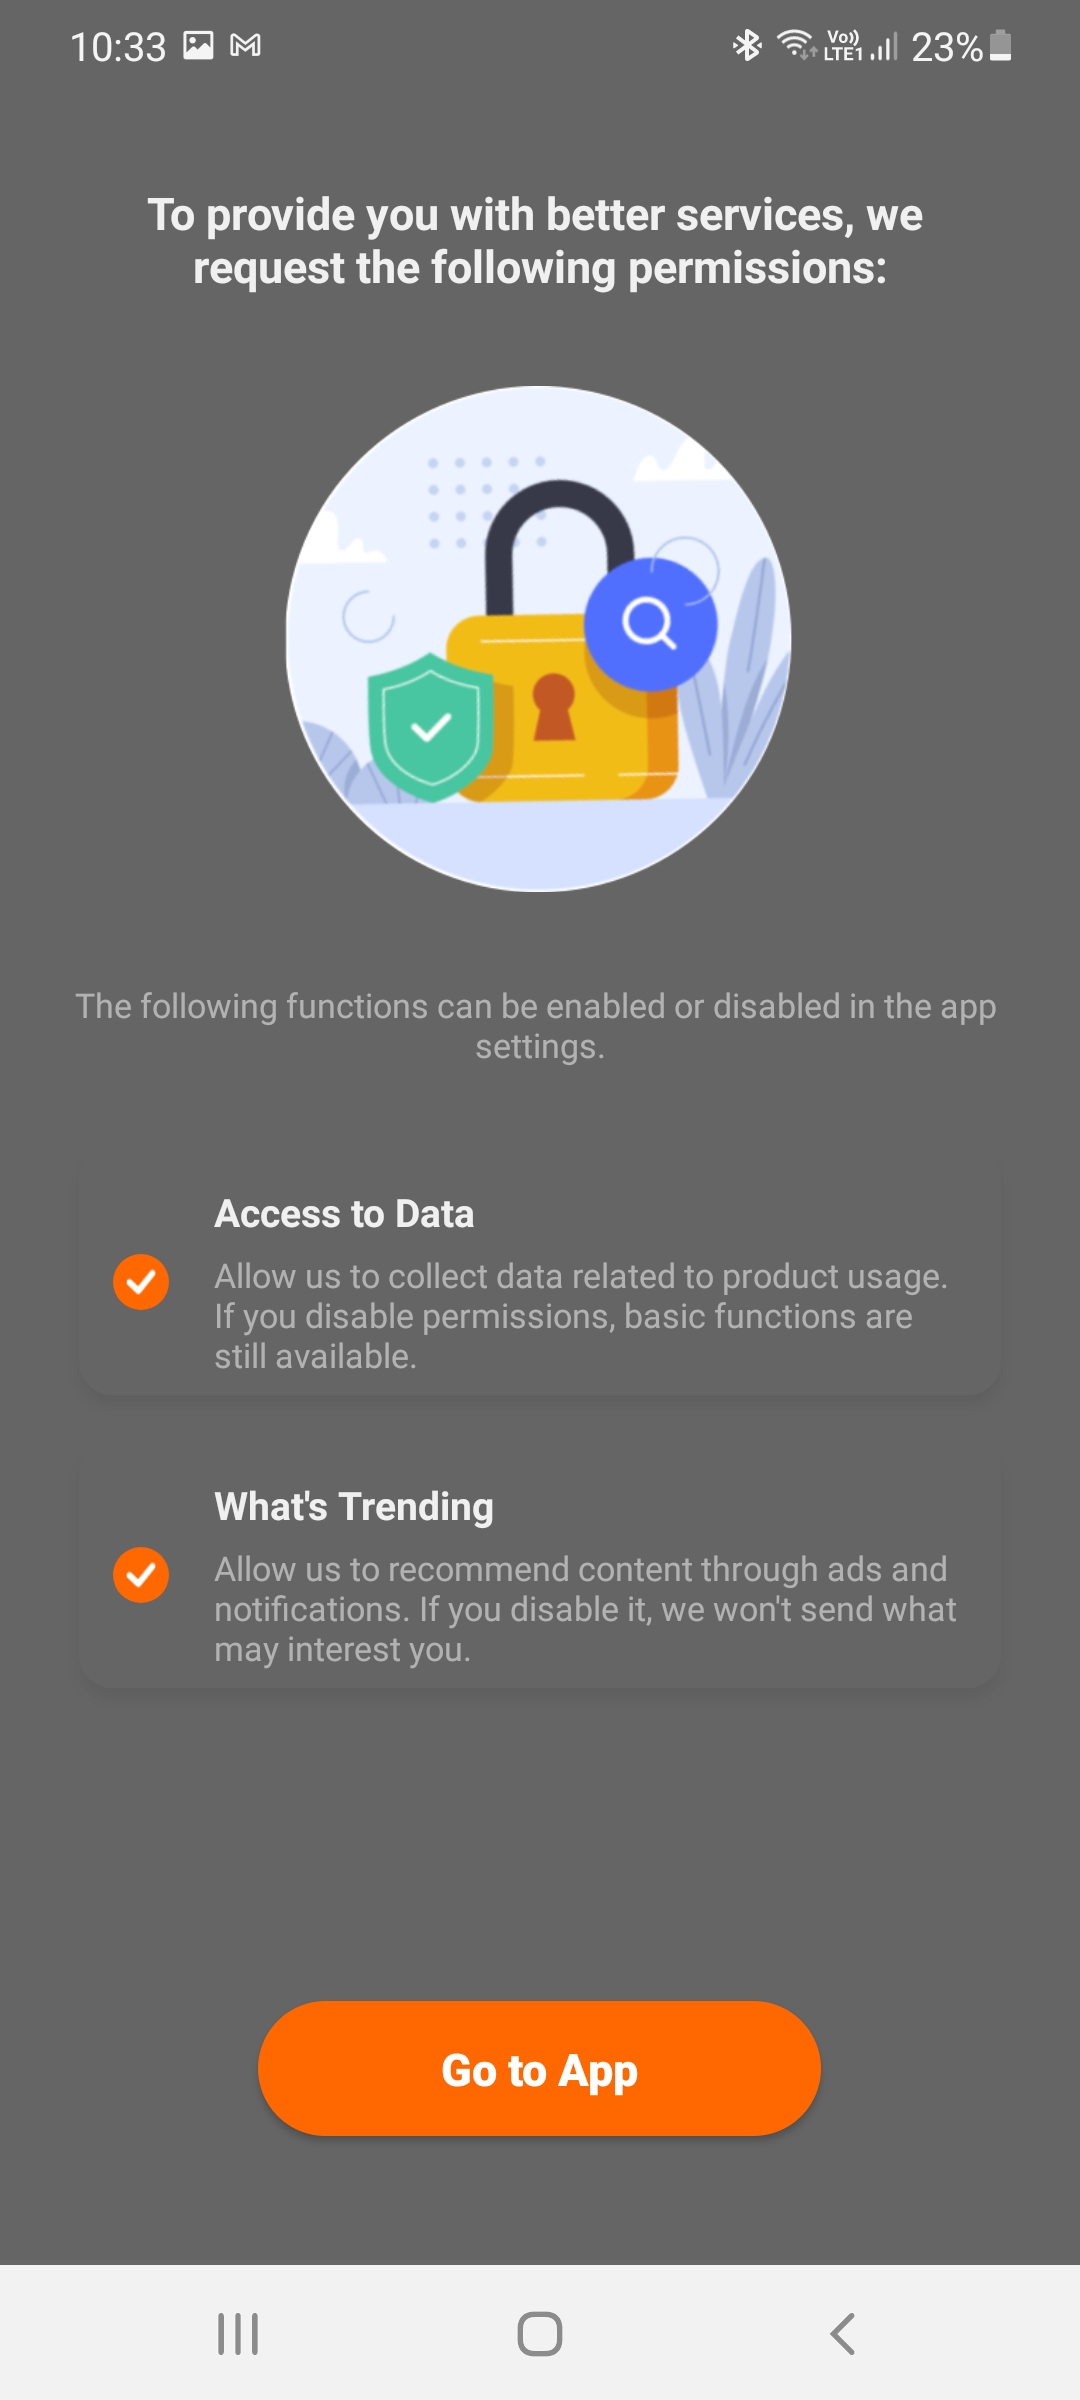
After setting the password, you will be
automatically redirected to the App
Permissions screen.
The permissions necessary for the App
to function correctly will be selected by
default. If you are agreeing to give App
the necessary permissions, select “Go
to App”.
Setting Up the Smart Switch - Using the Abseco App
Learn how to setup your Abseco smart switch using the Abseco App
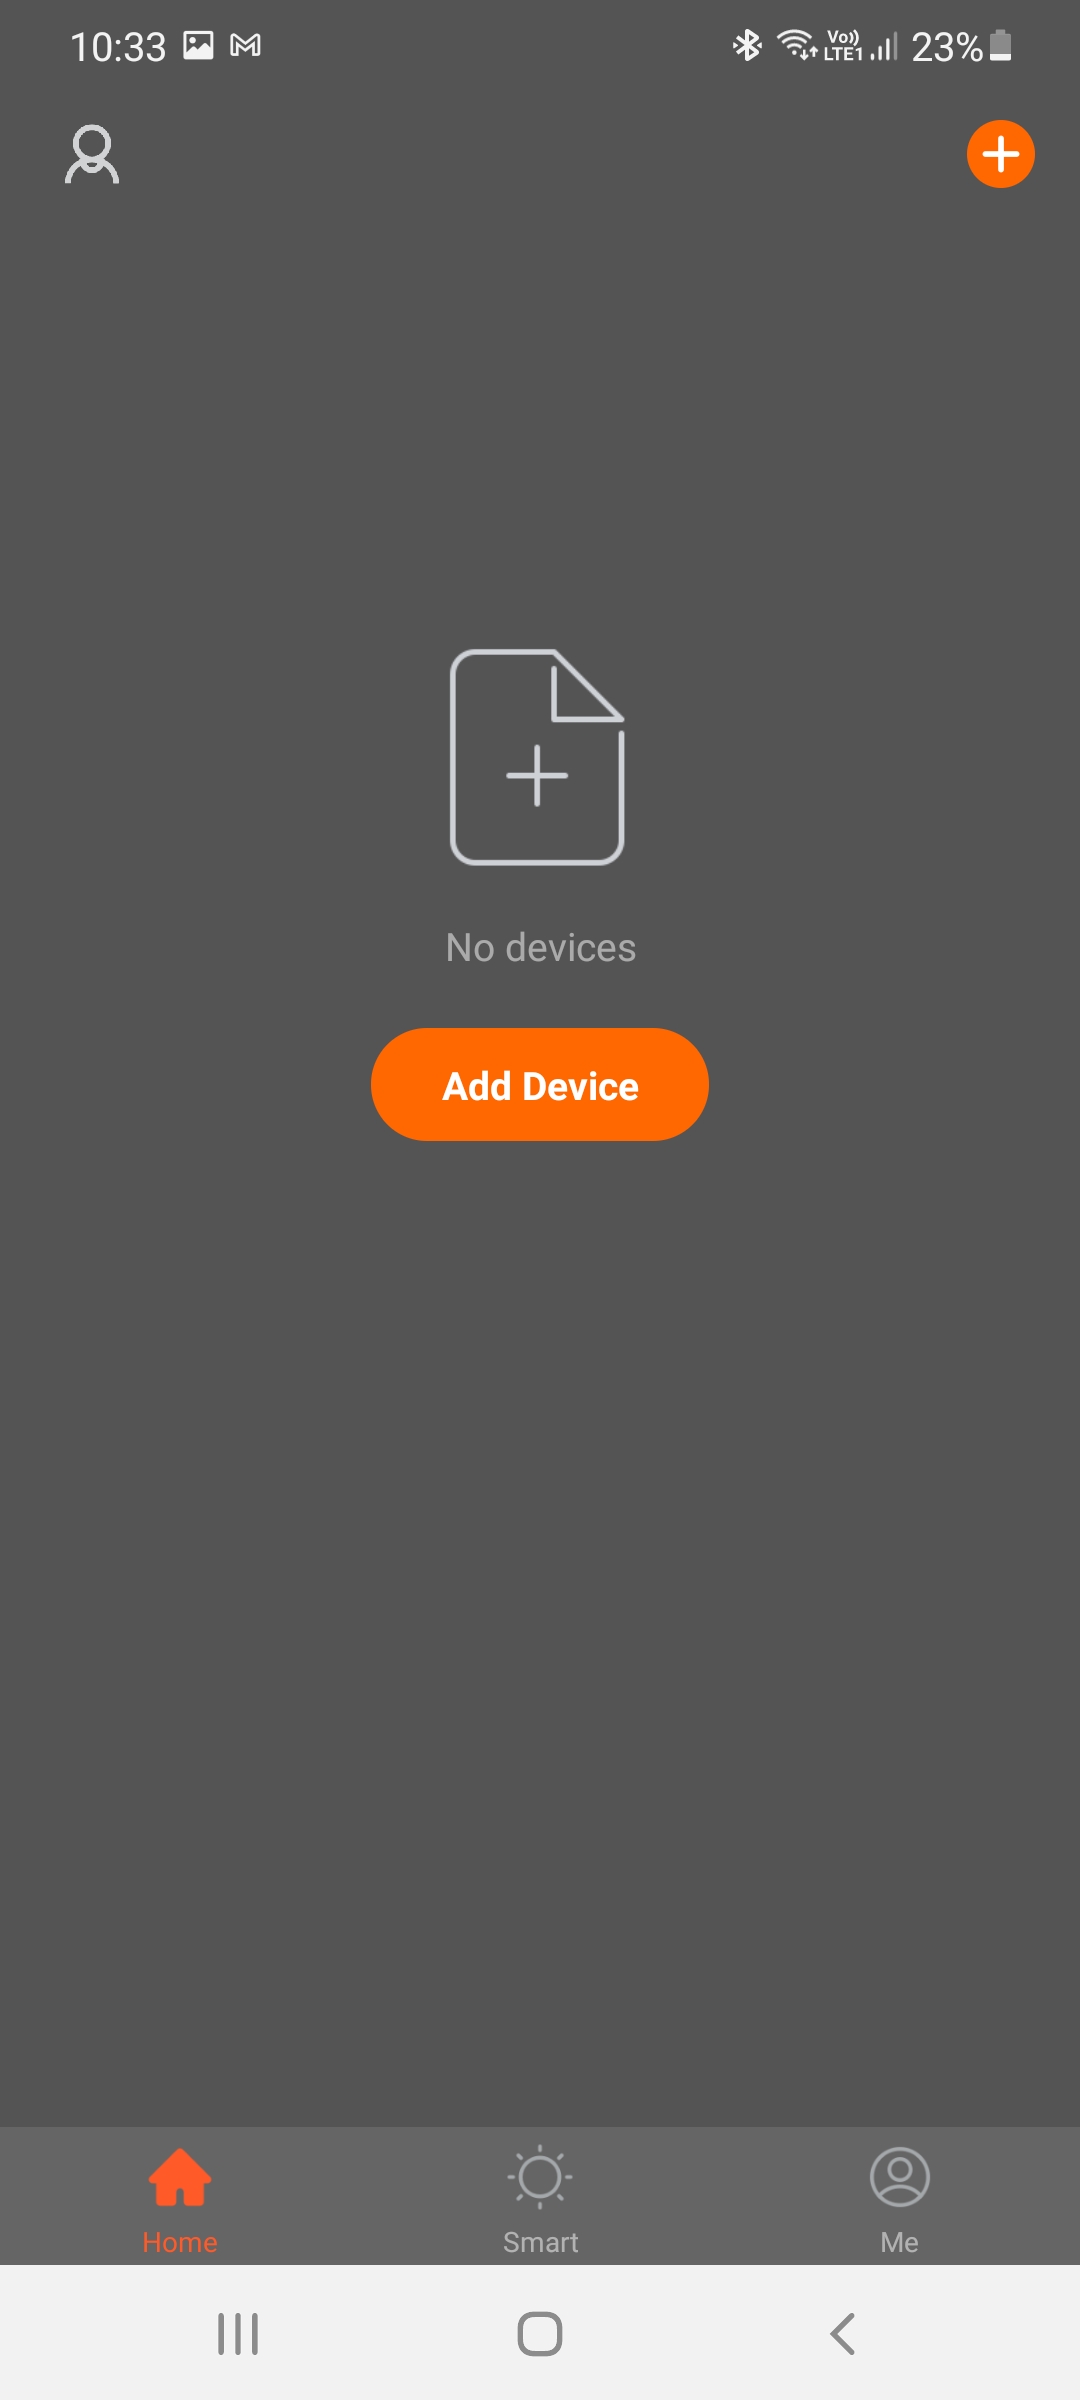
After successfully logging in, you will
be presented with the device
management main screen.
The user profile can be seen at the top
left corner.
To add personal information and
customize basic user profile settings,
click on the user profile icon.
Upload a profile photo, set a
Nickname for the user profile and set
the applicable timezone.
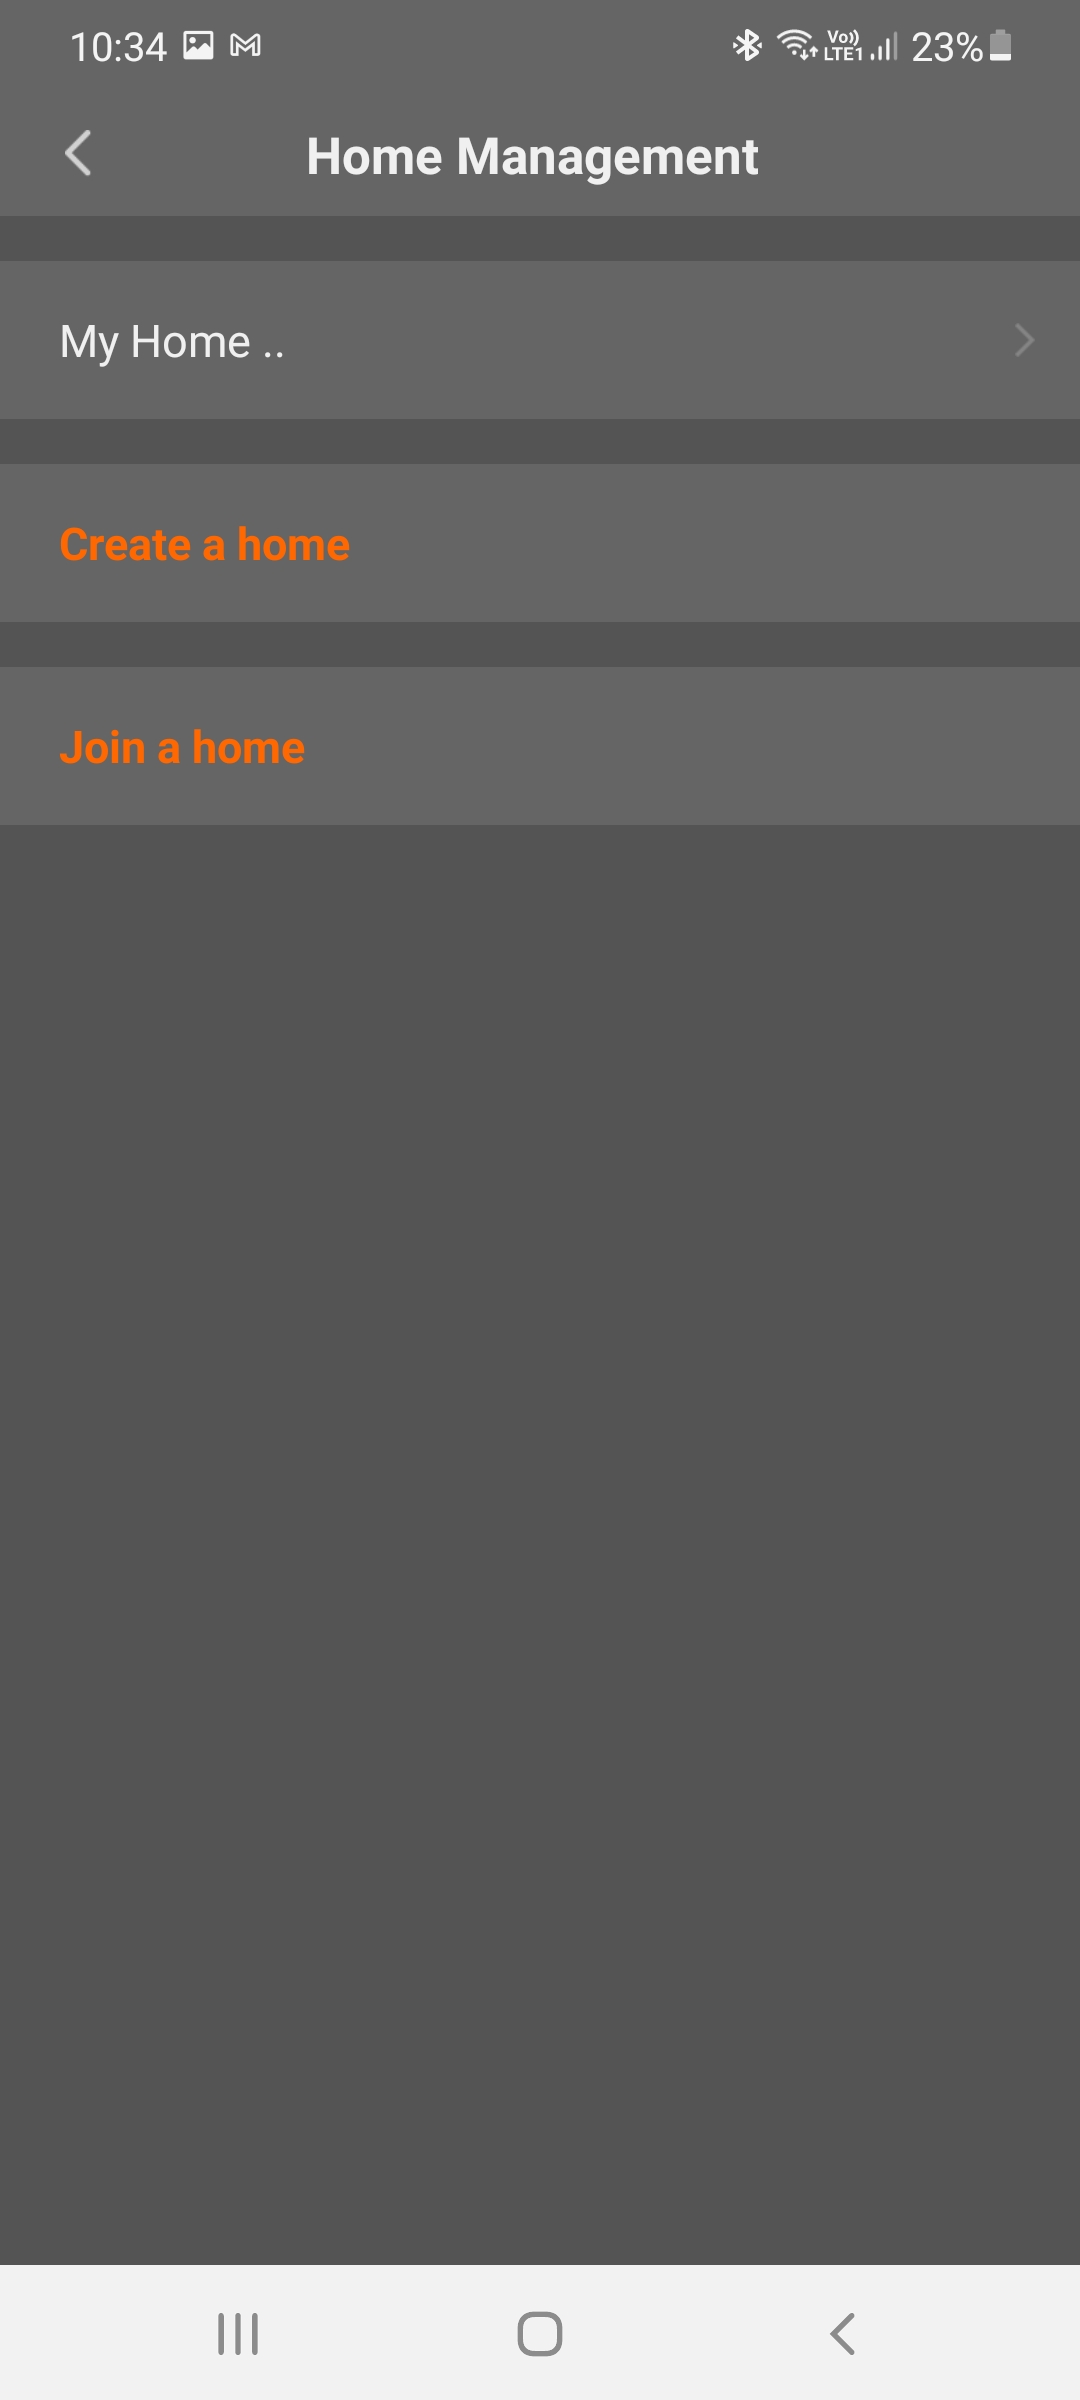
Select “Me” in the lower right corner
and select “Home Management” to go
to the Home Management screen.
Select “My Home” to go to the
“Complete Home Information” screen.
If you have already added homes earlier in the Home Management, you can
select “Add new” option to access the Edit Home Info screen.
Assign a Home Name based on your preference
NOTE: A maximum of 25 characters are allowed.
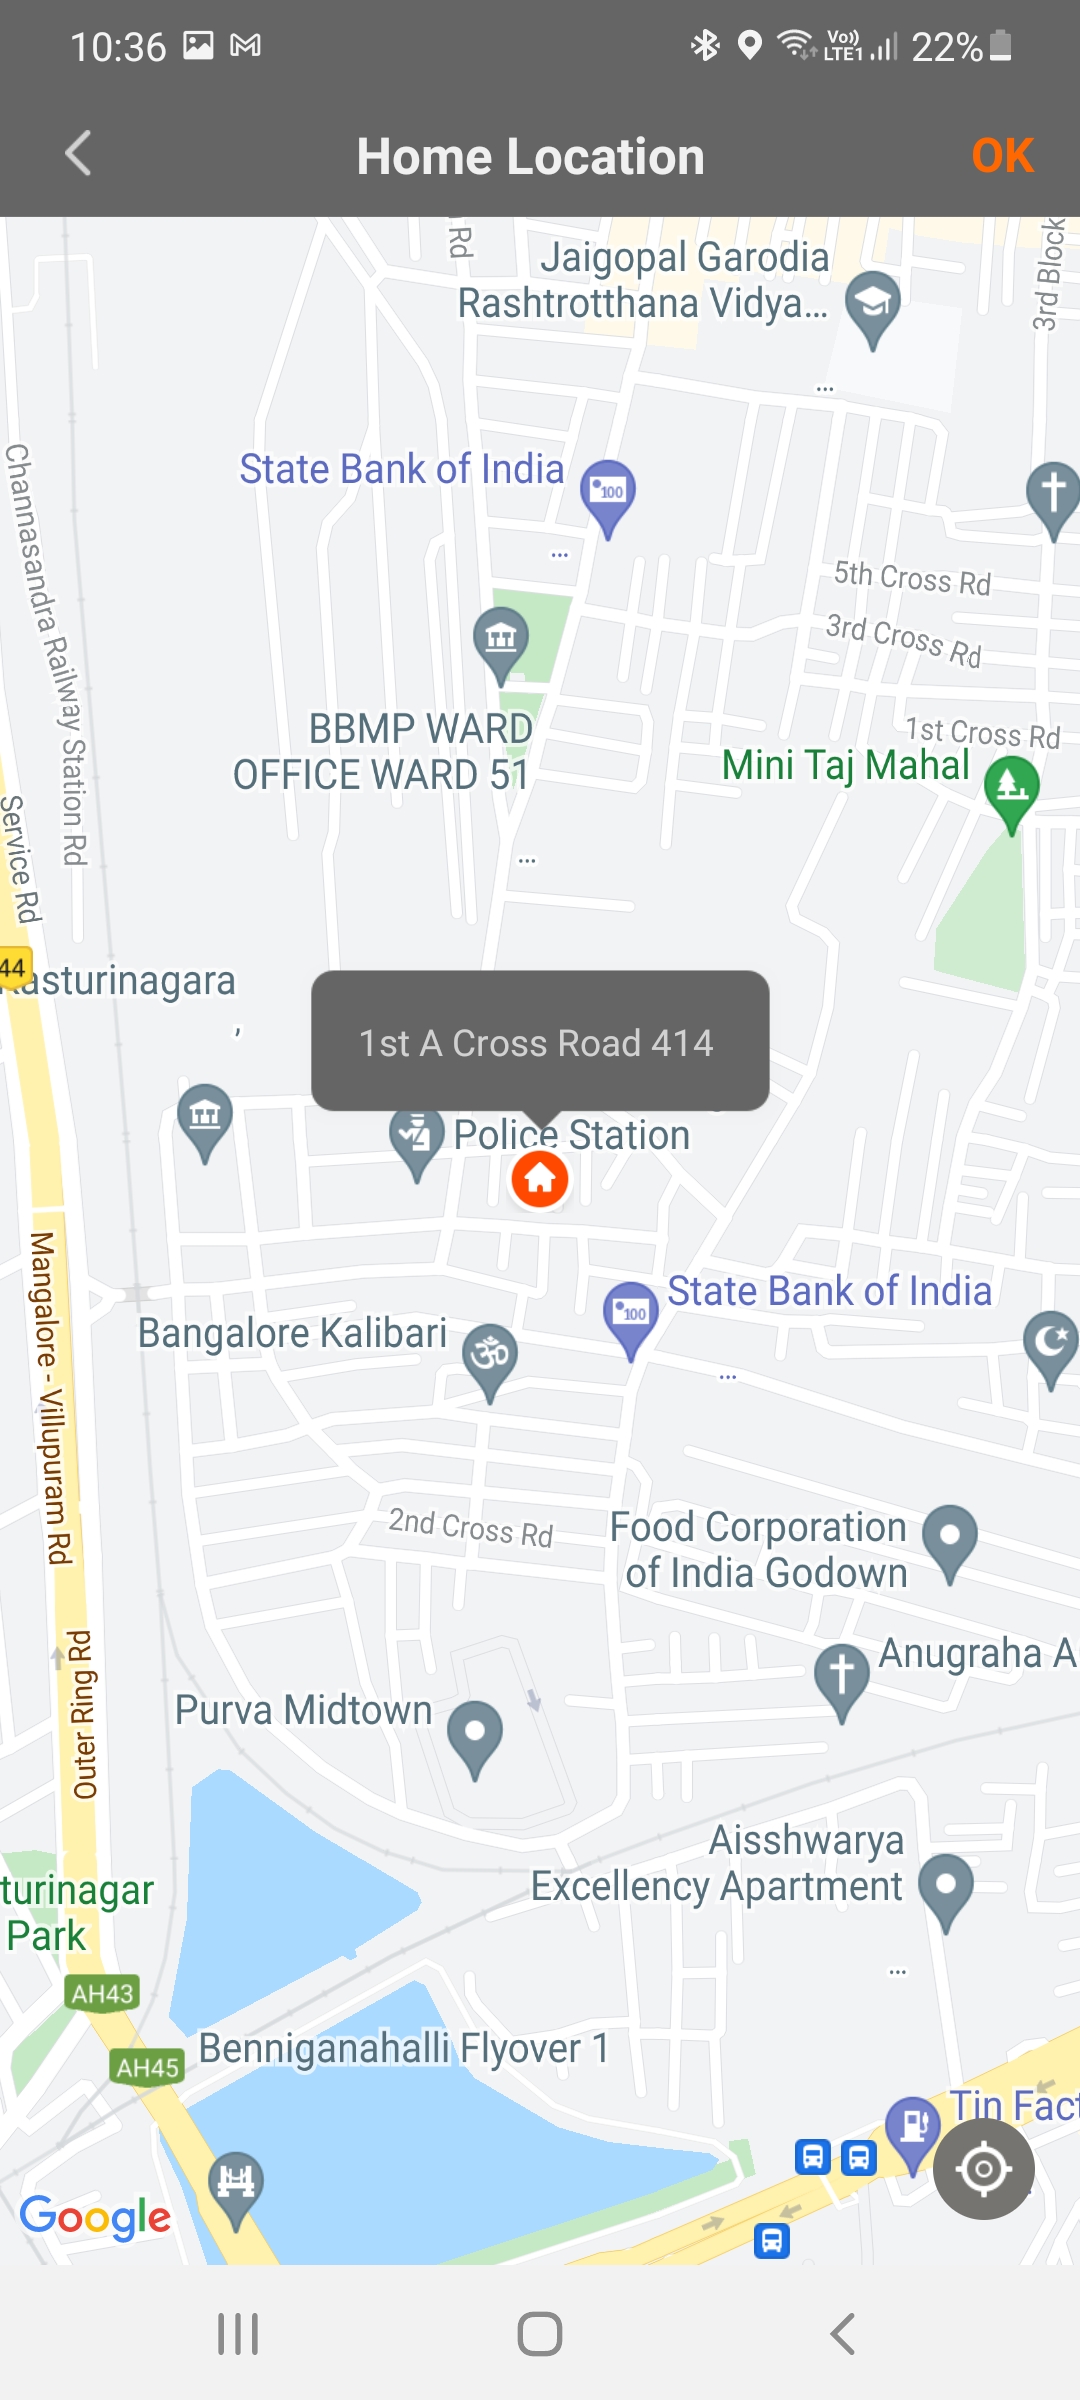
Next, set the Home Location. Home Location will change based on your phone
location. You can also change the Home Location by setting the home
coordinates on the map. Select “Save” after making sure the location is correct.
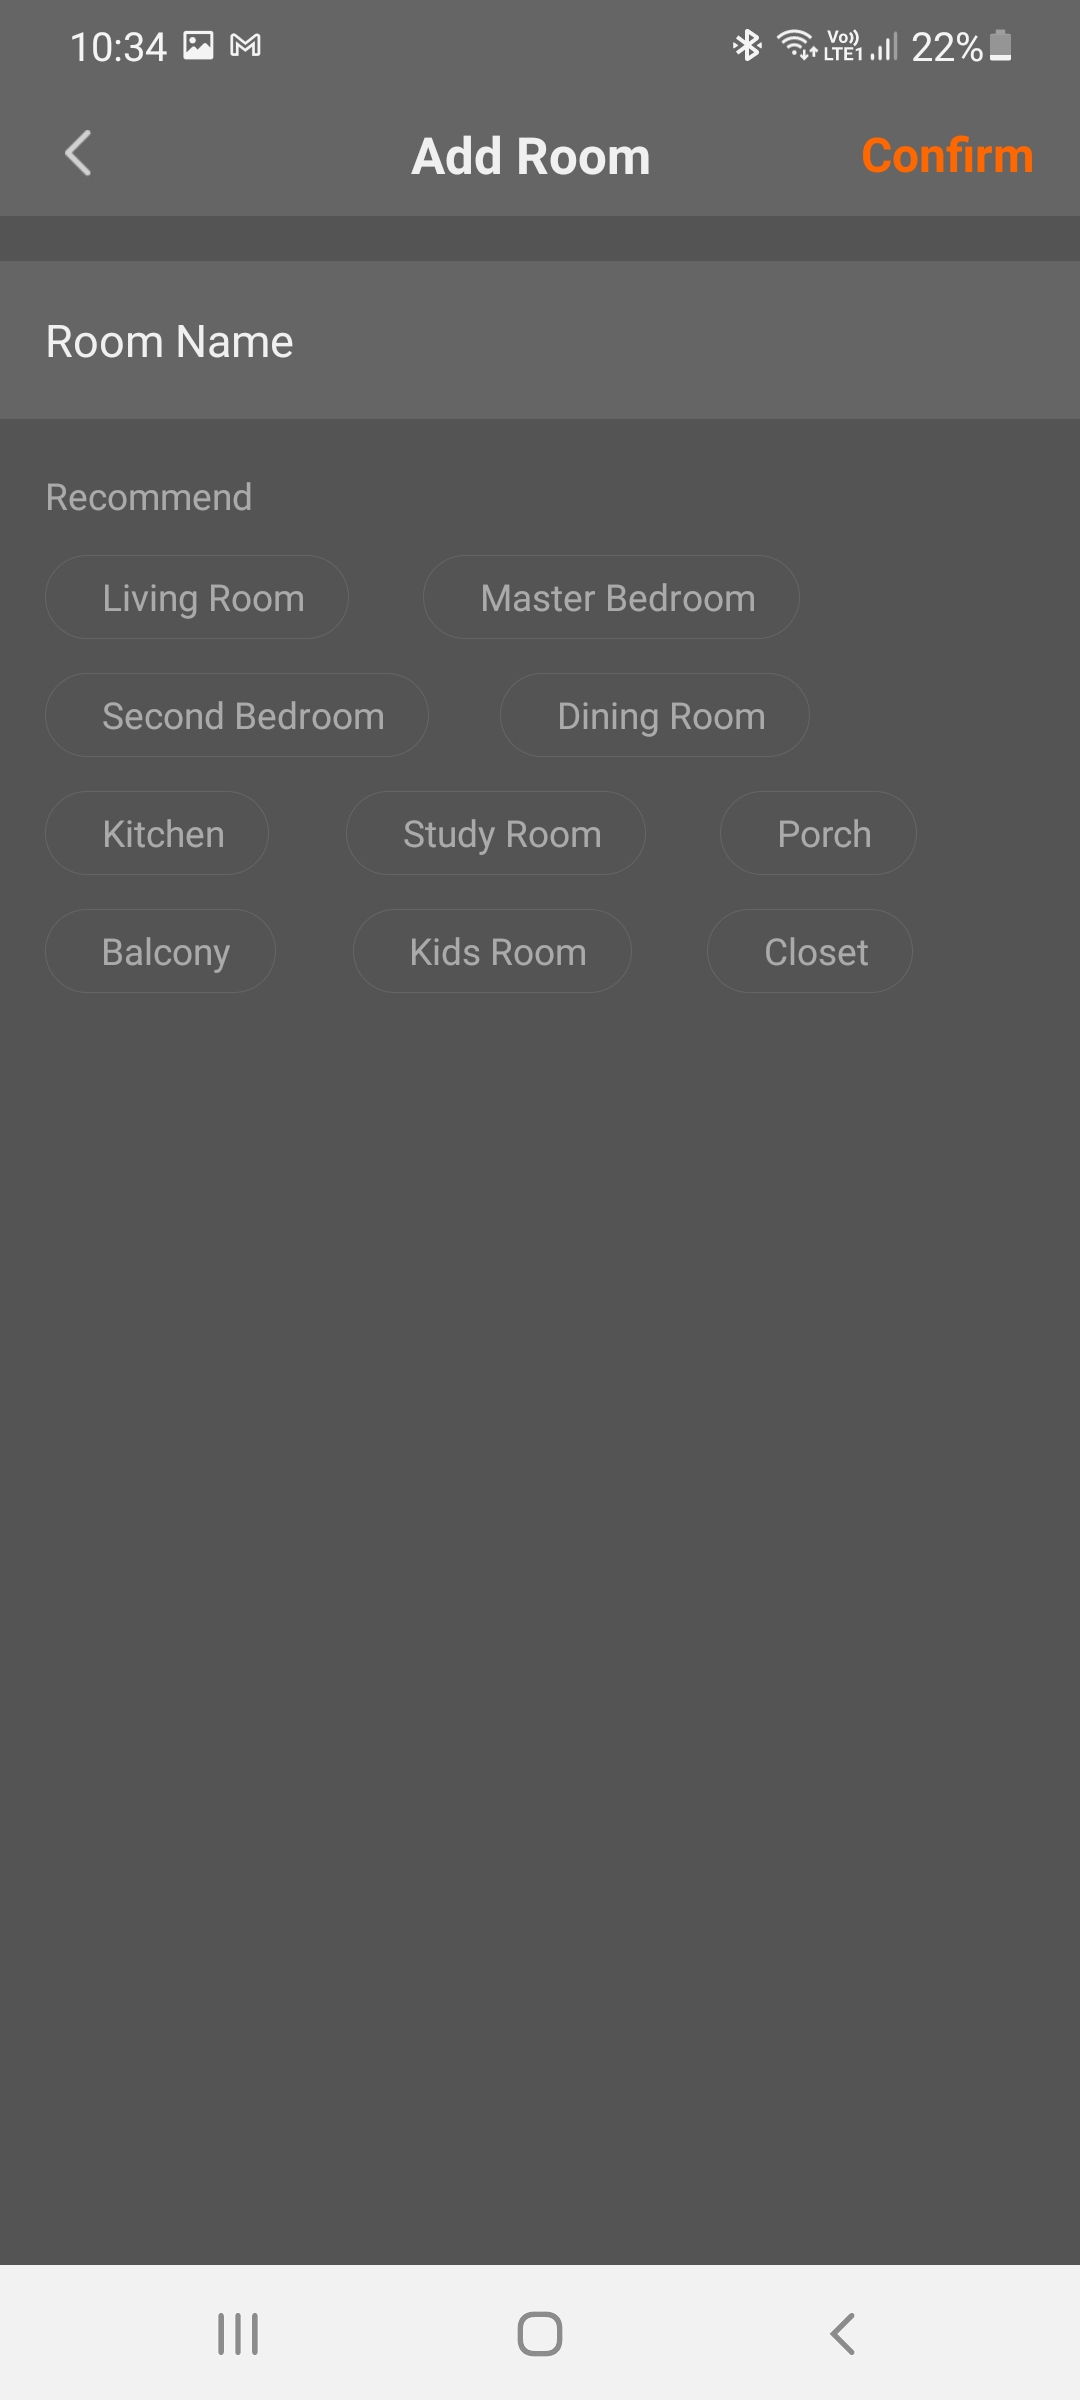
You can choose the default room names suggested by the App or click “Add
Room” to add a room with custom name.
NOTE: A maximum of 25 characters are allowed.
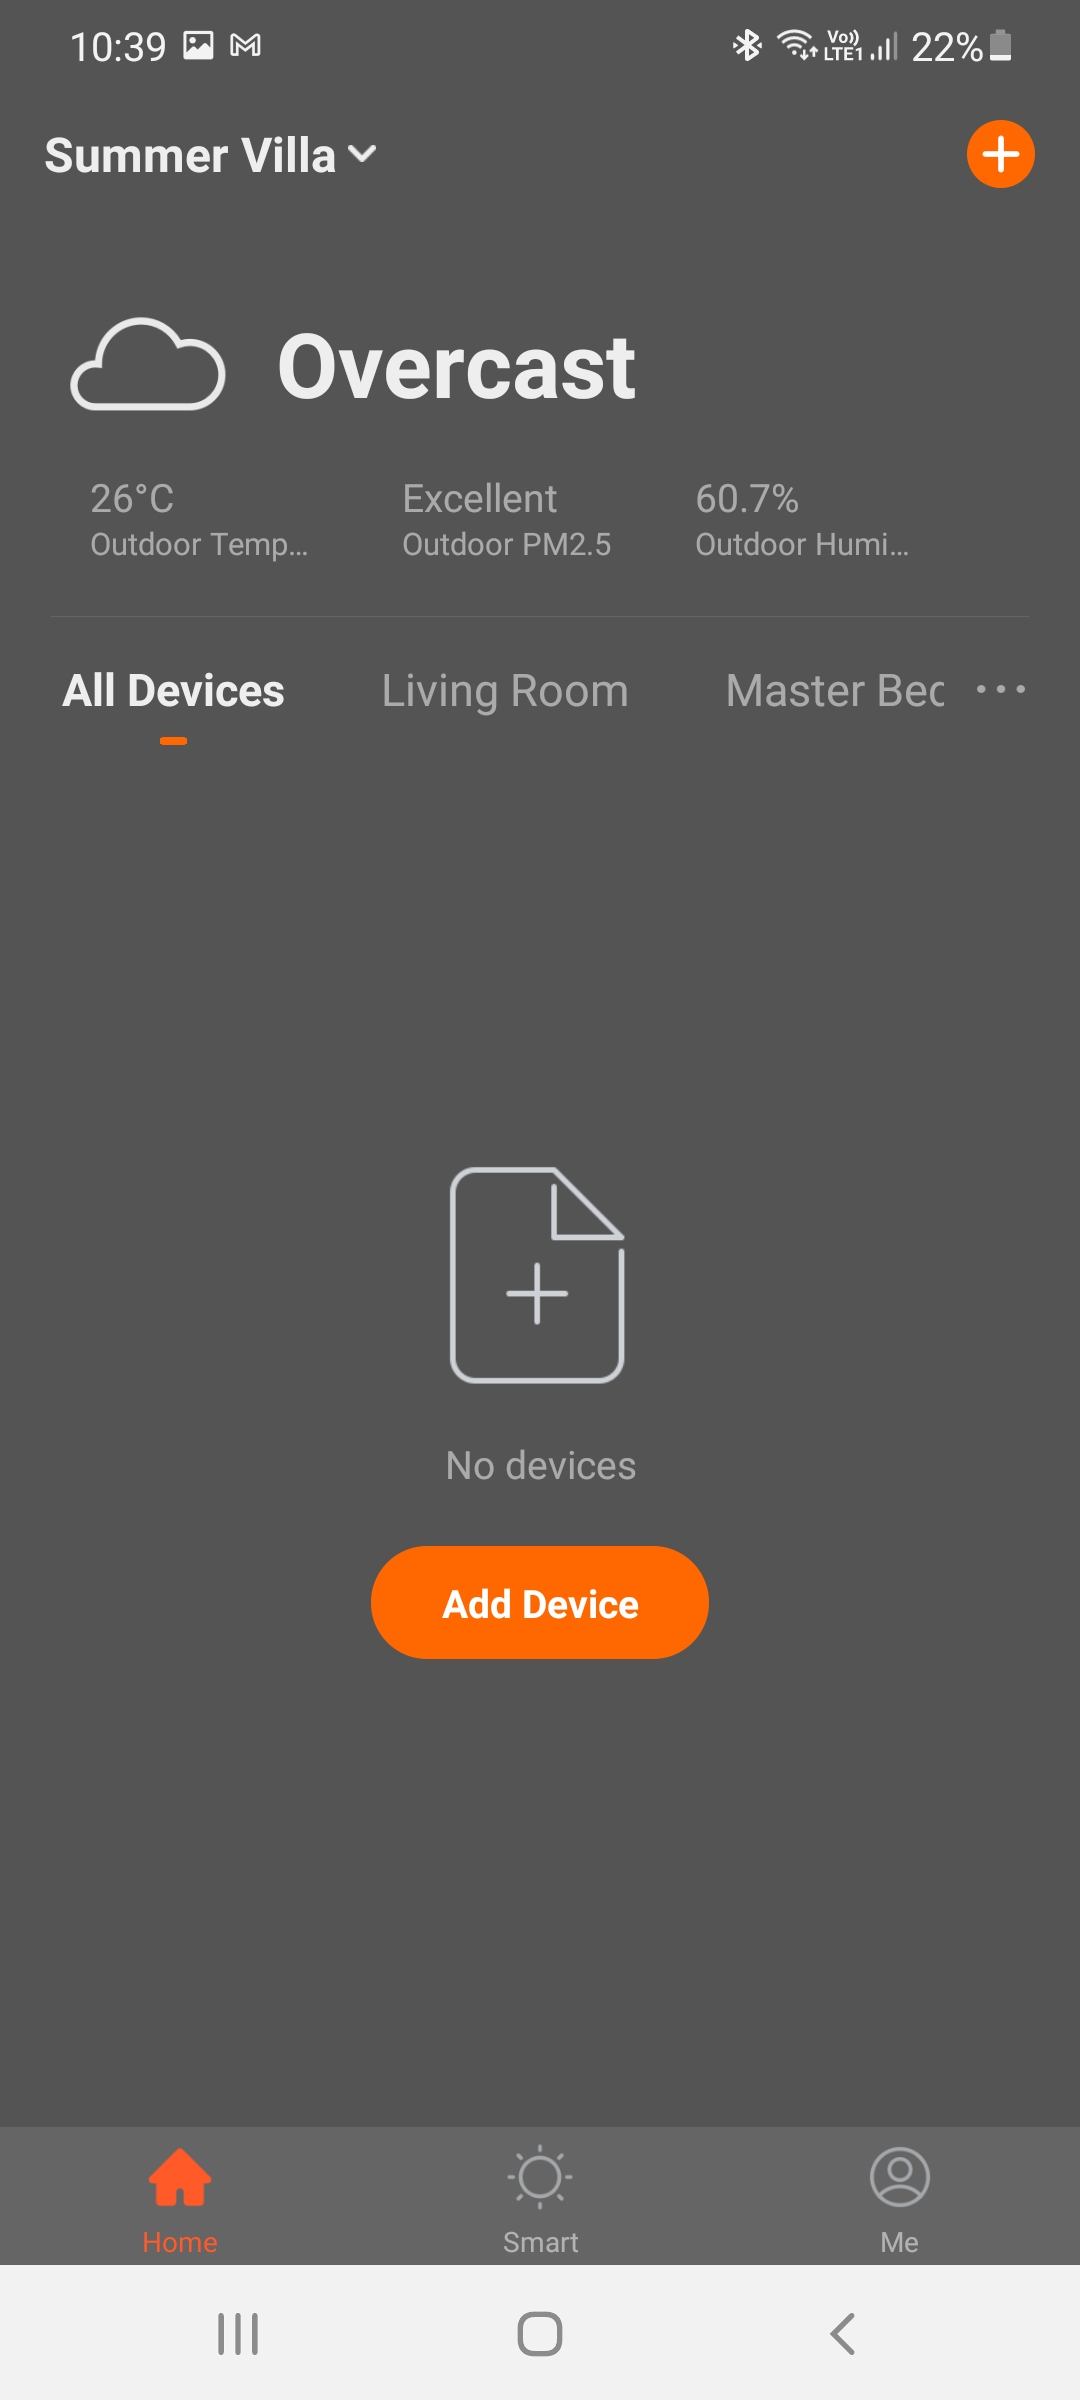
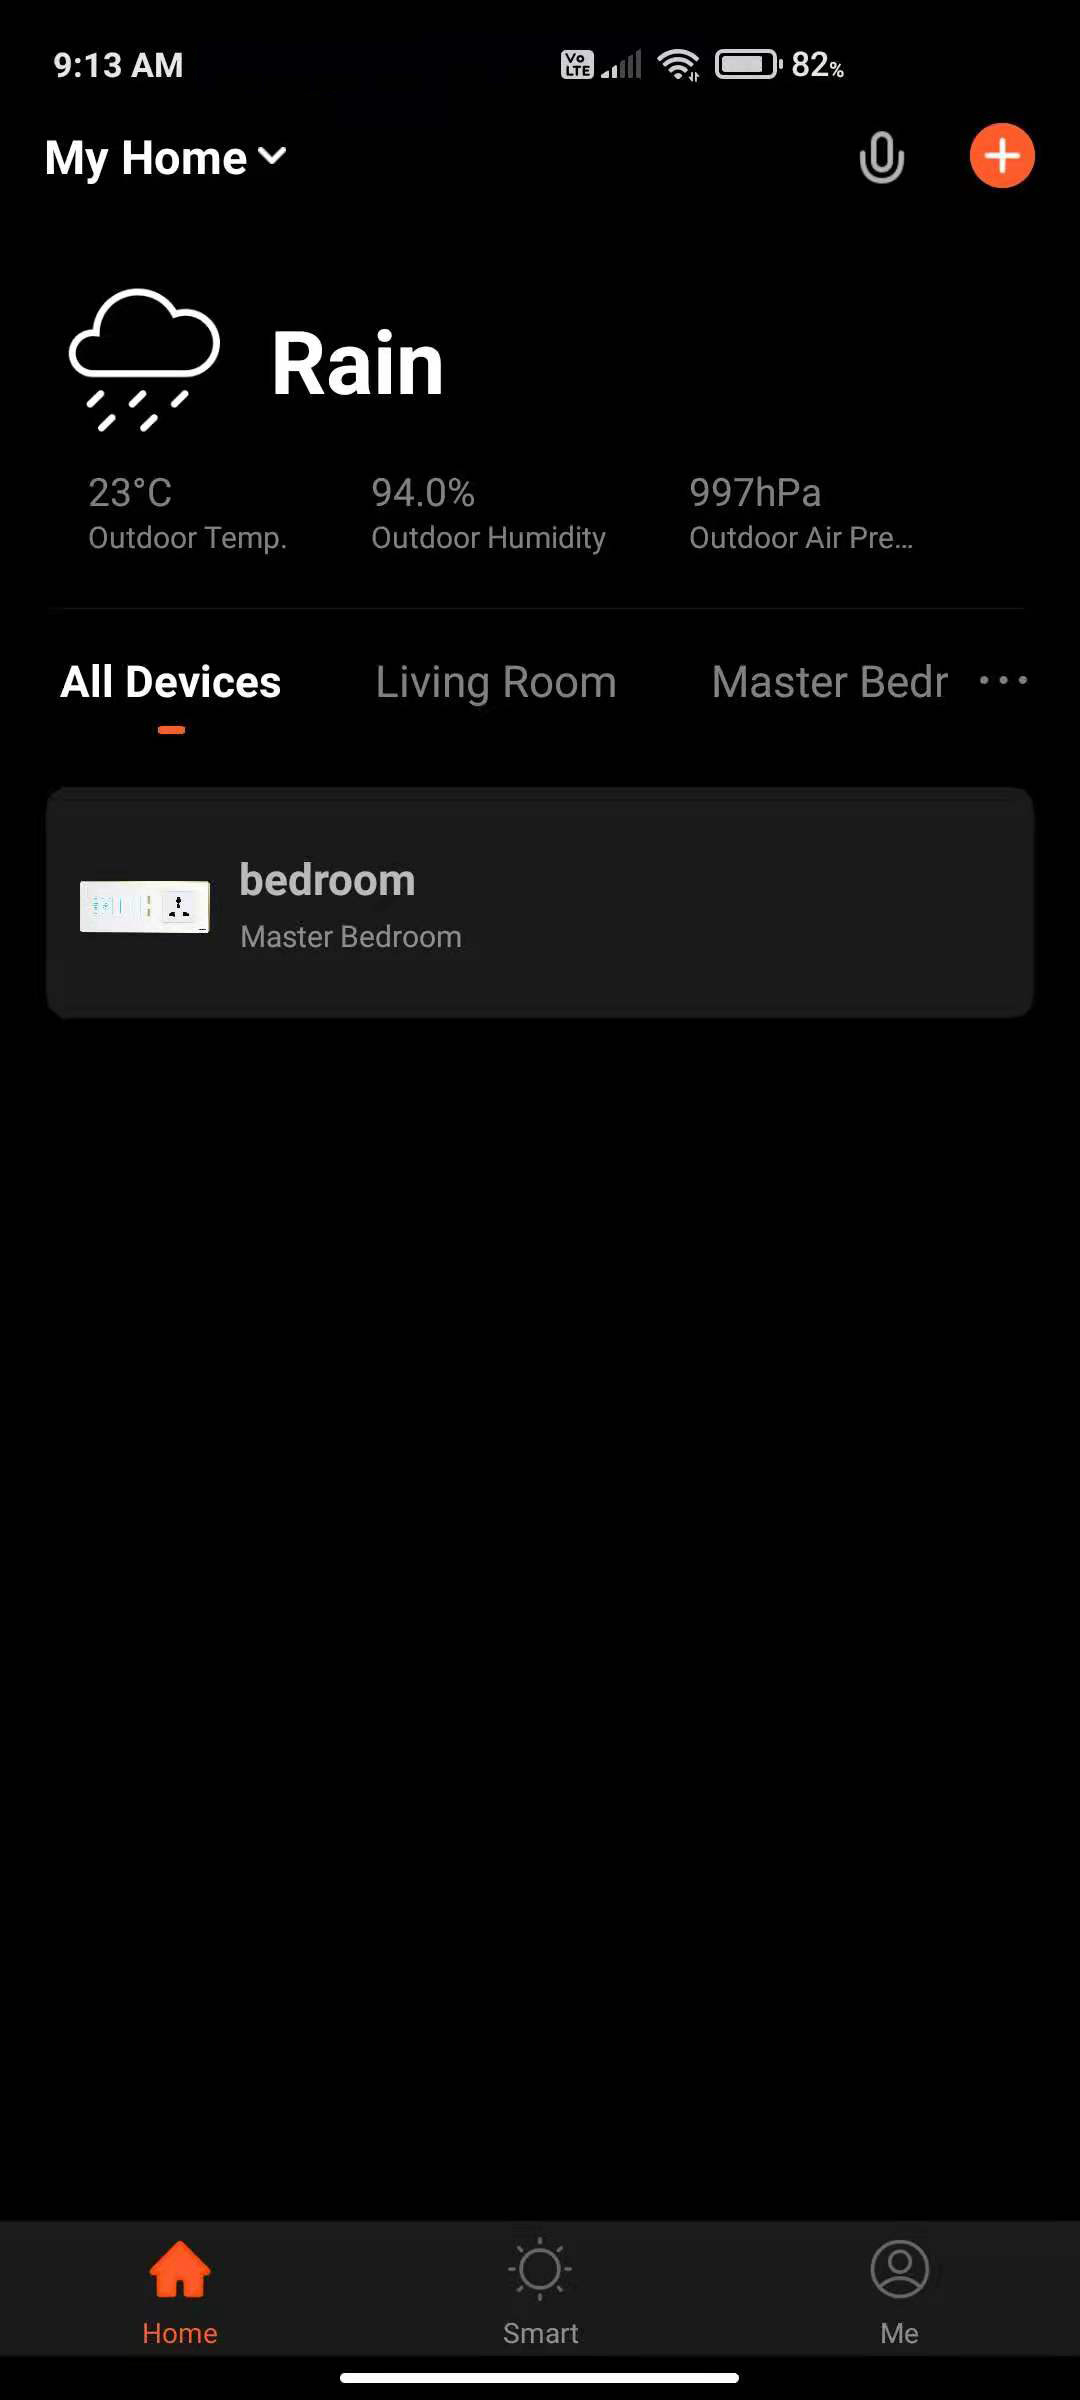
After you complete the Home
Information and return to the device
management main screen, you will
see information such as weather,
humidity level, and room names.
If you have added more than one
home, click the drop-down button on
the upper left to view, select and
manage other homes.
Now, you can add Abseco Smart
Switch to the device list.
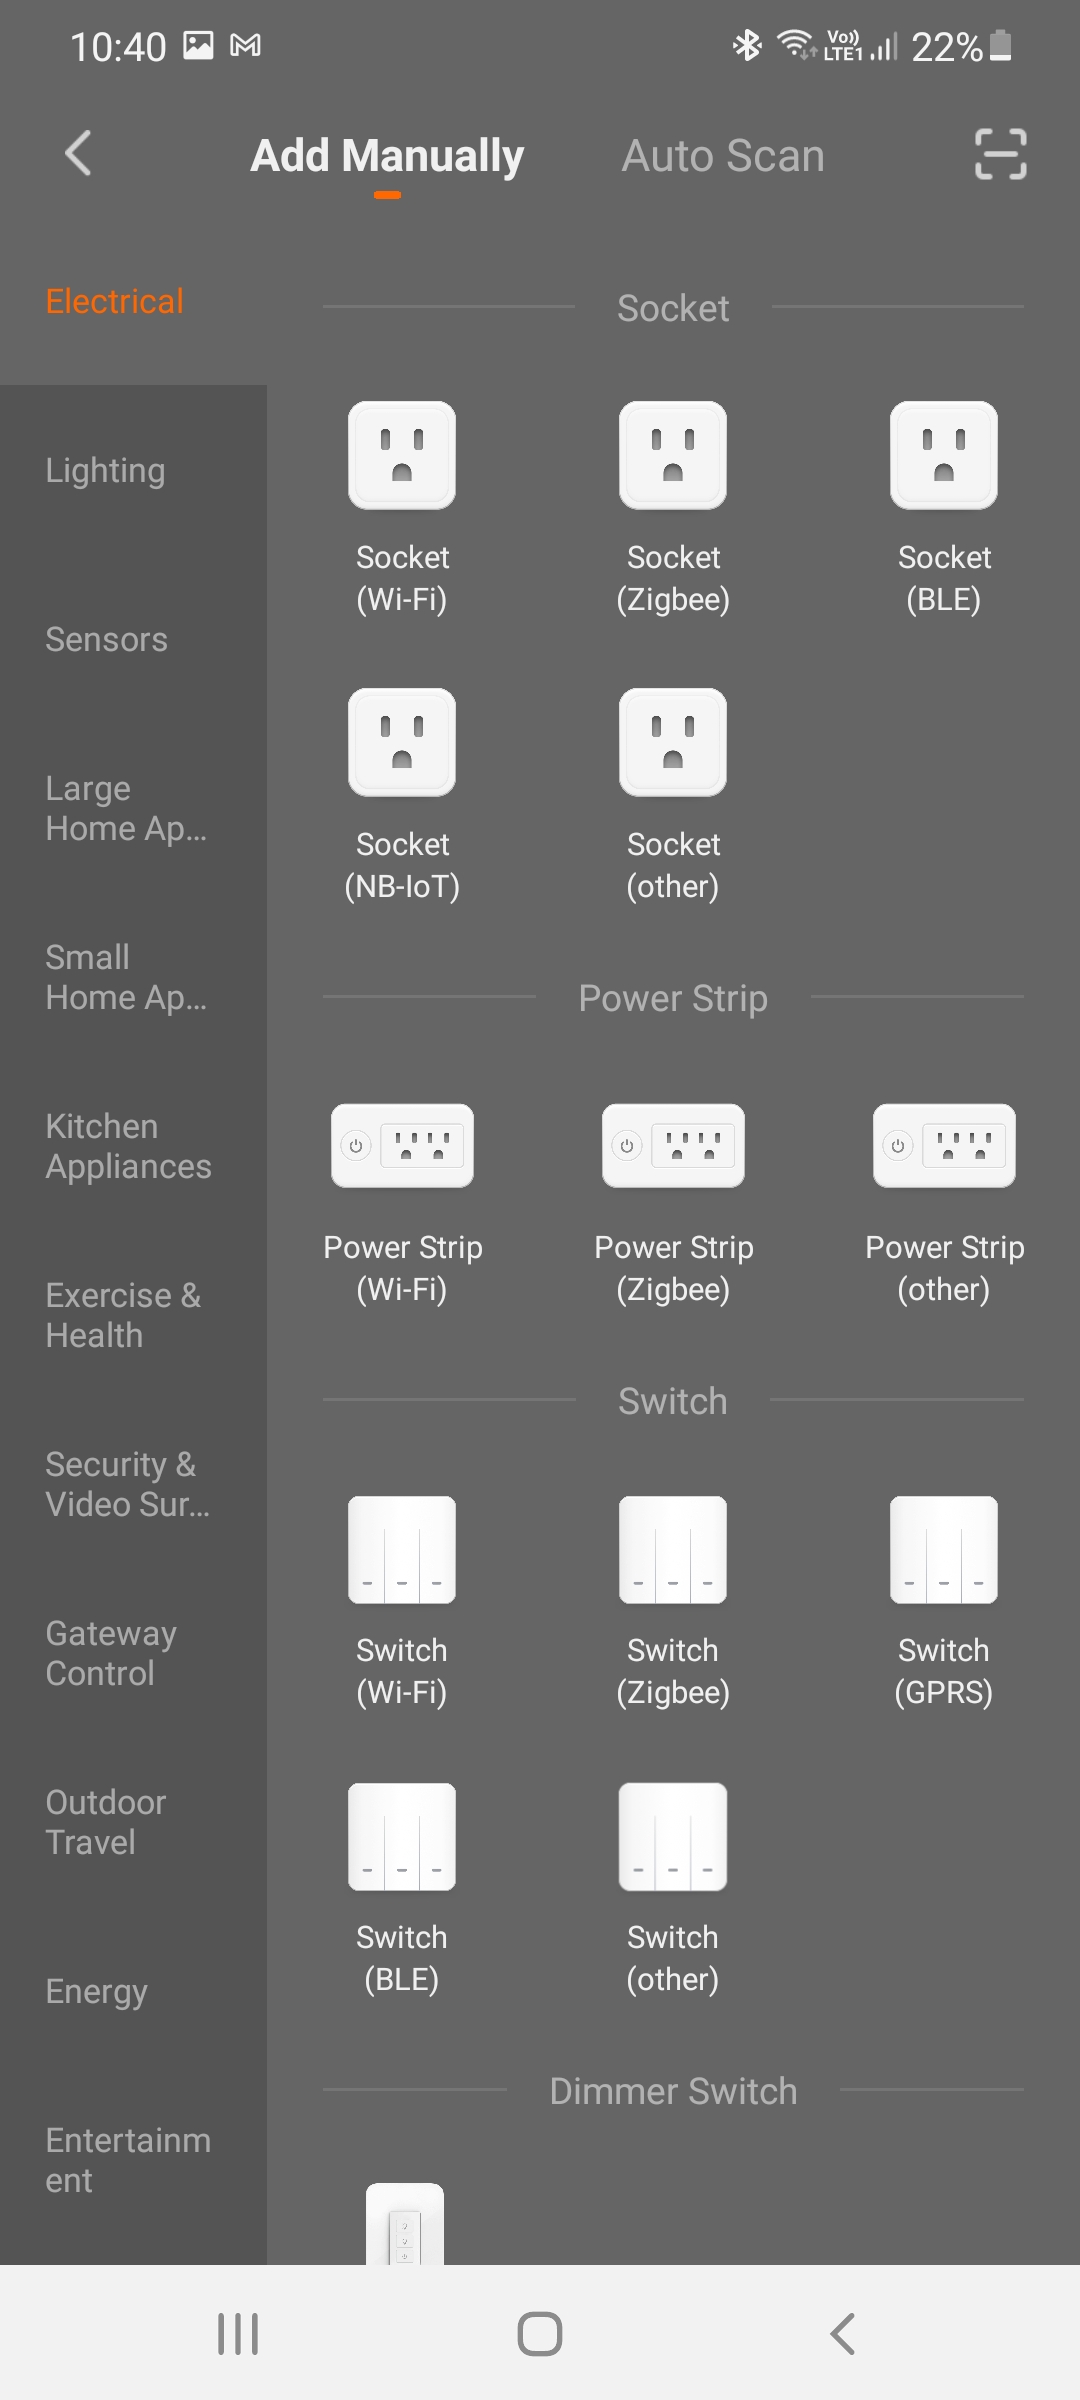
Select “Add Device” button in the device management dashboard and a device
type selection screen will be displayed. Select “Switch (Wi-Fi)” from the list.
You will be now presented with device setup screen. Press and hold Abseco
Smart Switch until the indicator light starts blinking to enable setup mode. Then,
select “Next” button.
Choose your home Wi-Fi network and enter the password. This information will
be synced with your Abseco Smart Switch to connect the smart switch to your
home Wi-Fi network.
After successfully adding the device, go to device management dashboard to
view and control the smart switch.
Reset Password
Learn how to reset your Abseco App user account password.
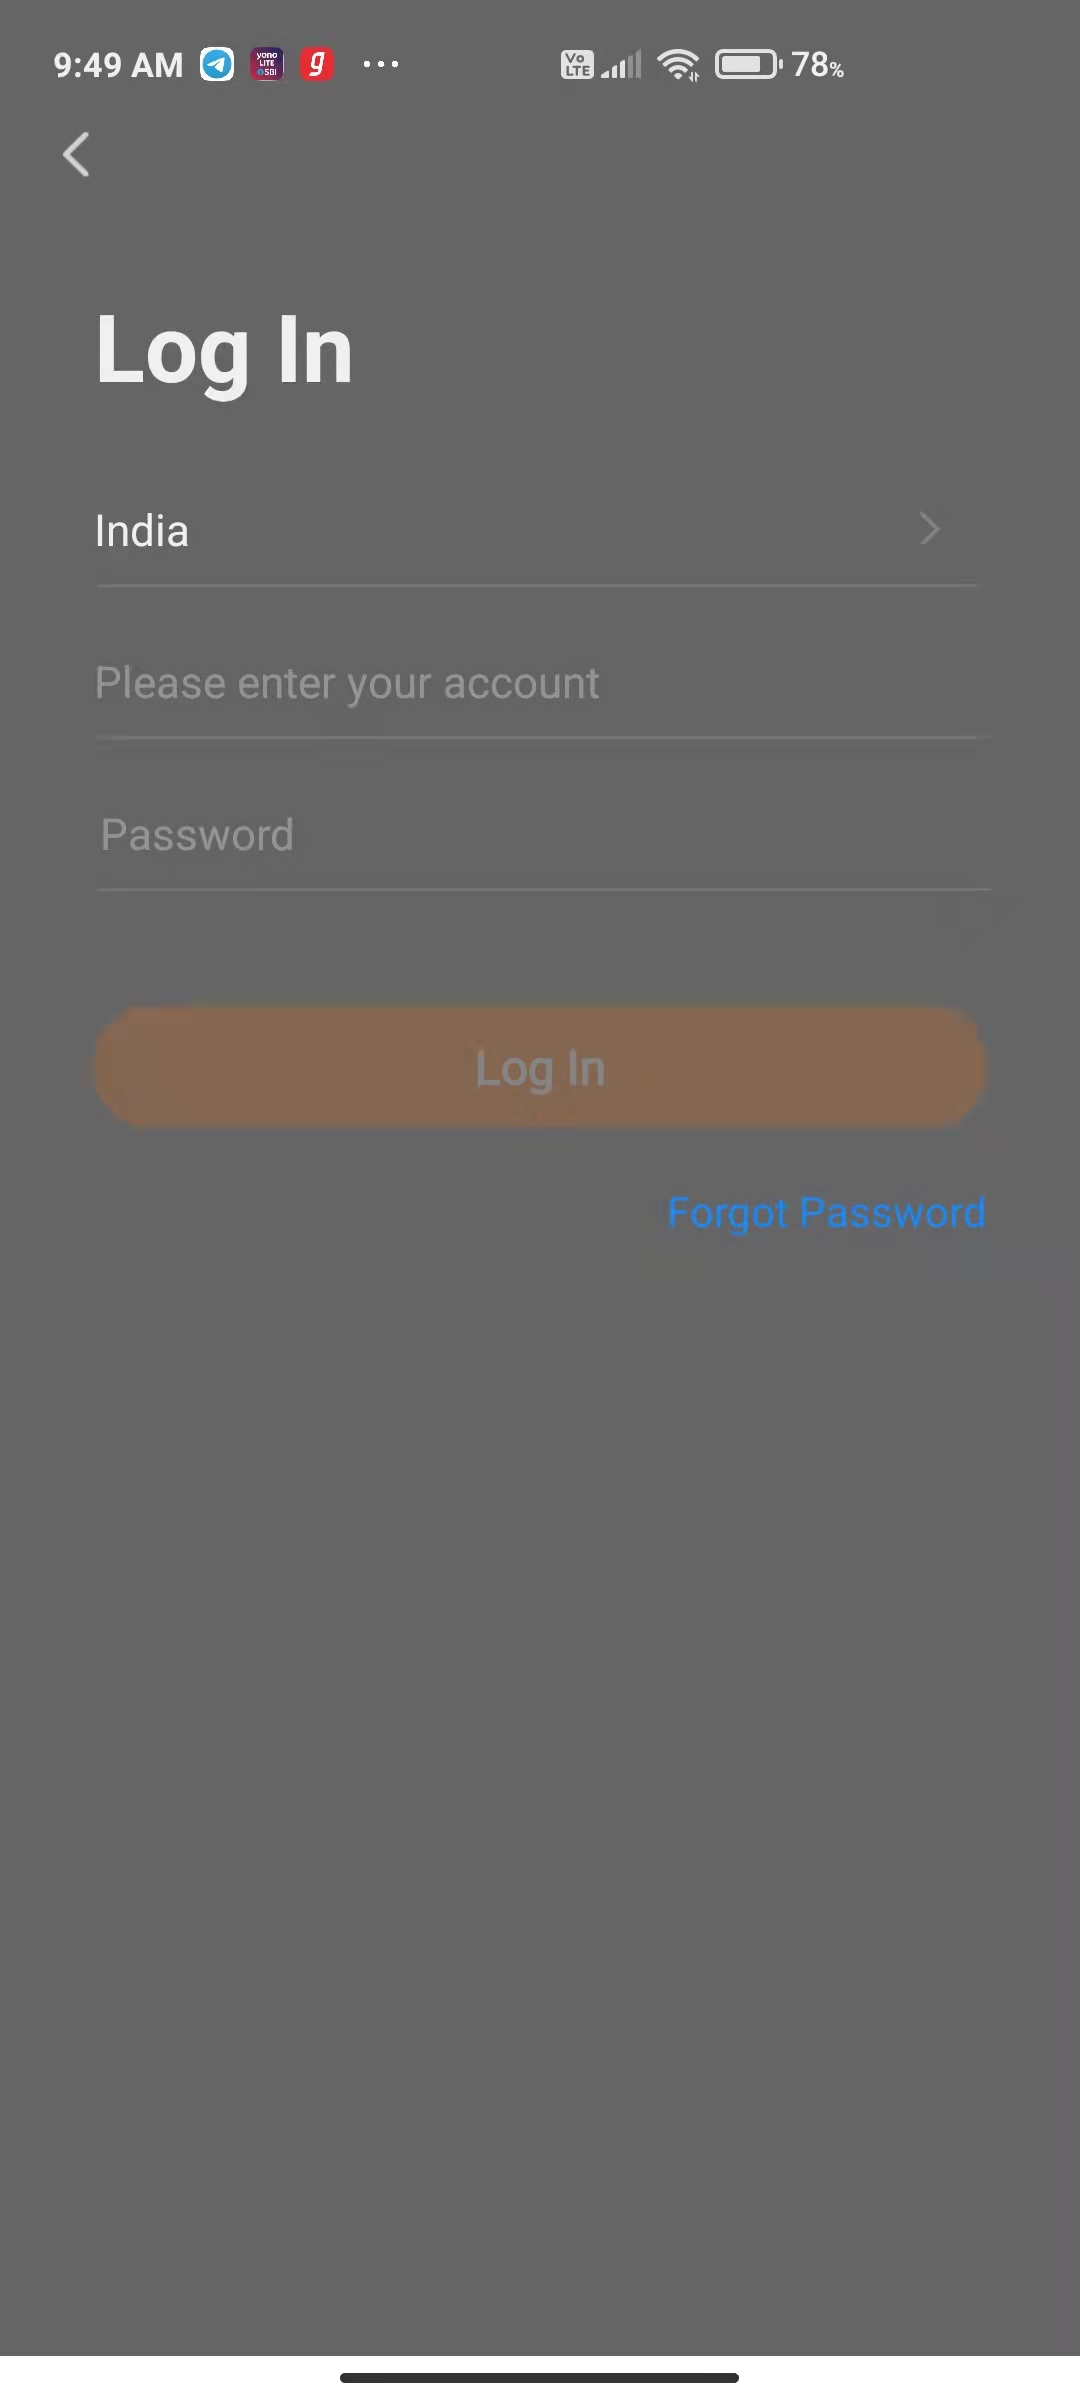
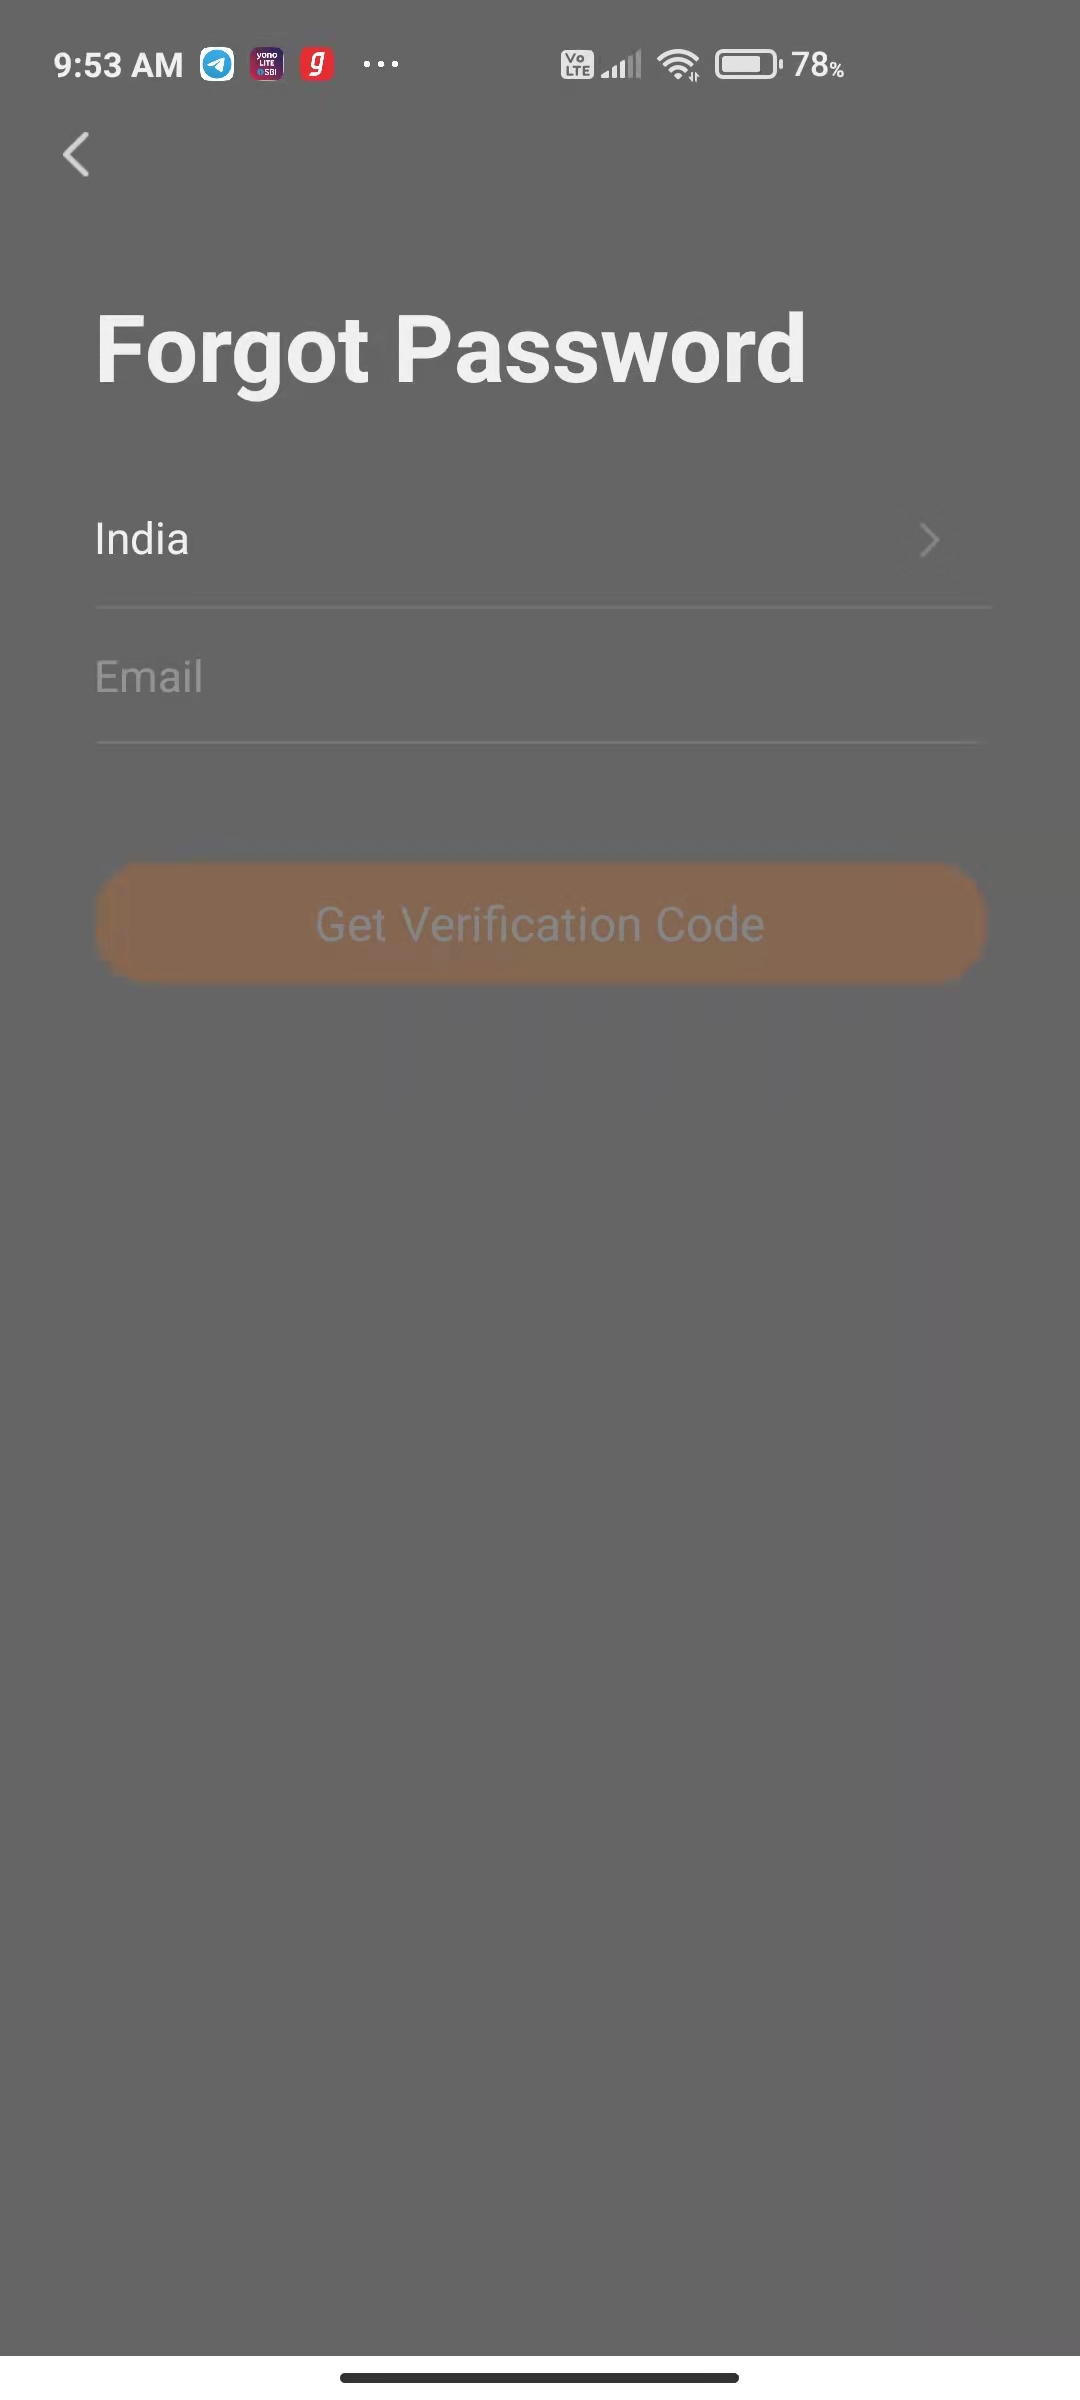
If you forget the password, follow these steps to reset it.
Click "Forgot Password".
The system will automatically locate the current country/region you are in. You can also choose the country/region yourself.
Enter the mobile number/email you used to register and click "Get Verification Code".
Enter the verification code you received via SMS or email.
Enter your new password and
click “Done” to reset the password. The app
will automatically log you in using your new
password. For security, the app automatically scans for risks in the phone system when logging in. If it detects a rooting or jailbreaking risk, a "Security Reminder" will pop up and you can choose to exit the app. (If you do not choose anything, the app will exit automatically.)
Home Management
Learn how to manage your home and home members in Abseco app.
After you log in to the app as a new user, the listed devices will appear on the Home page. Your profile photo is displayed in the top left corner. Before you complete your home information, the Home page does not display environment or room information.
Tap Me in the bottom right corner. On the Me page, tap Home Management.
If you are a new user, after you tap Home Management, verify that the Edit Home Info page appears.
If you have added a home, tap Create a home on the Home Management page to go to the Create a home page.
Enter a name for your home in the Home Name field. (A maximum of 25 characters is allowed.)
Tap Home Location. On the Home Location page, verify that the location is correct and tap OK in the top right corner. The home location is set based on your phone location. You can also change the home location by setting the home coordinate.
Select rooms in the Rooms section. You can use the room names given in the app or tap Add Room to customize room names. (A maximum of 25 characters is allowed for a room name.)
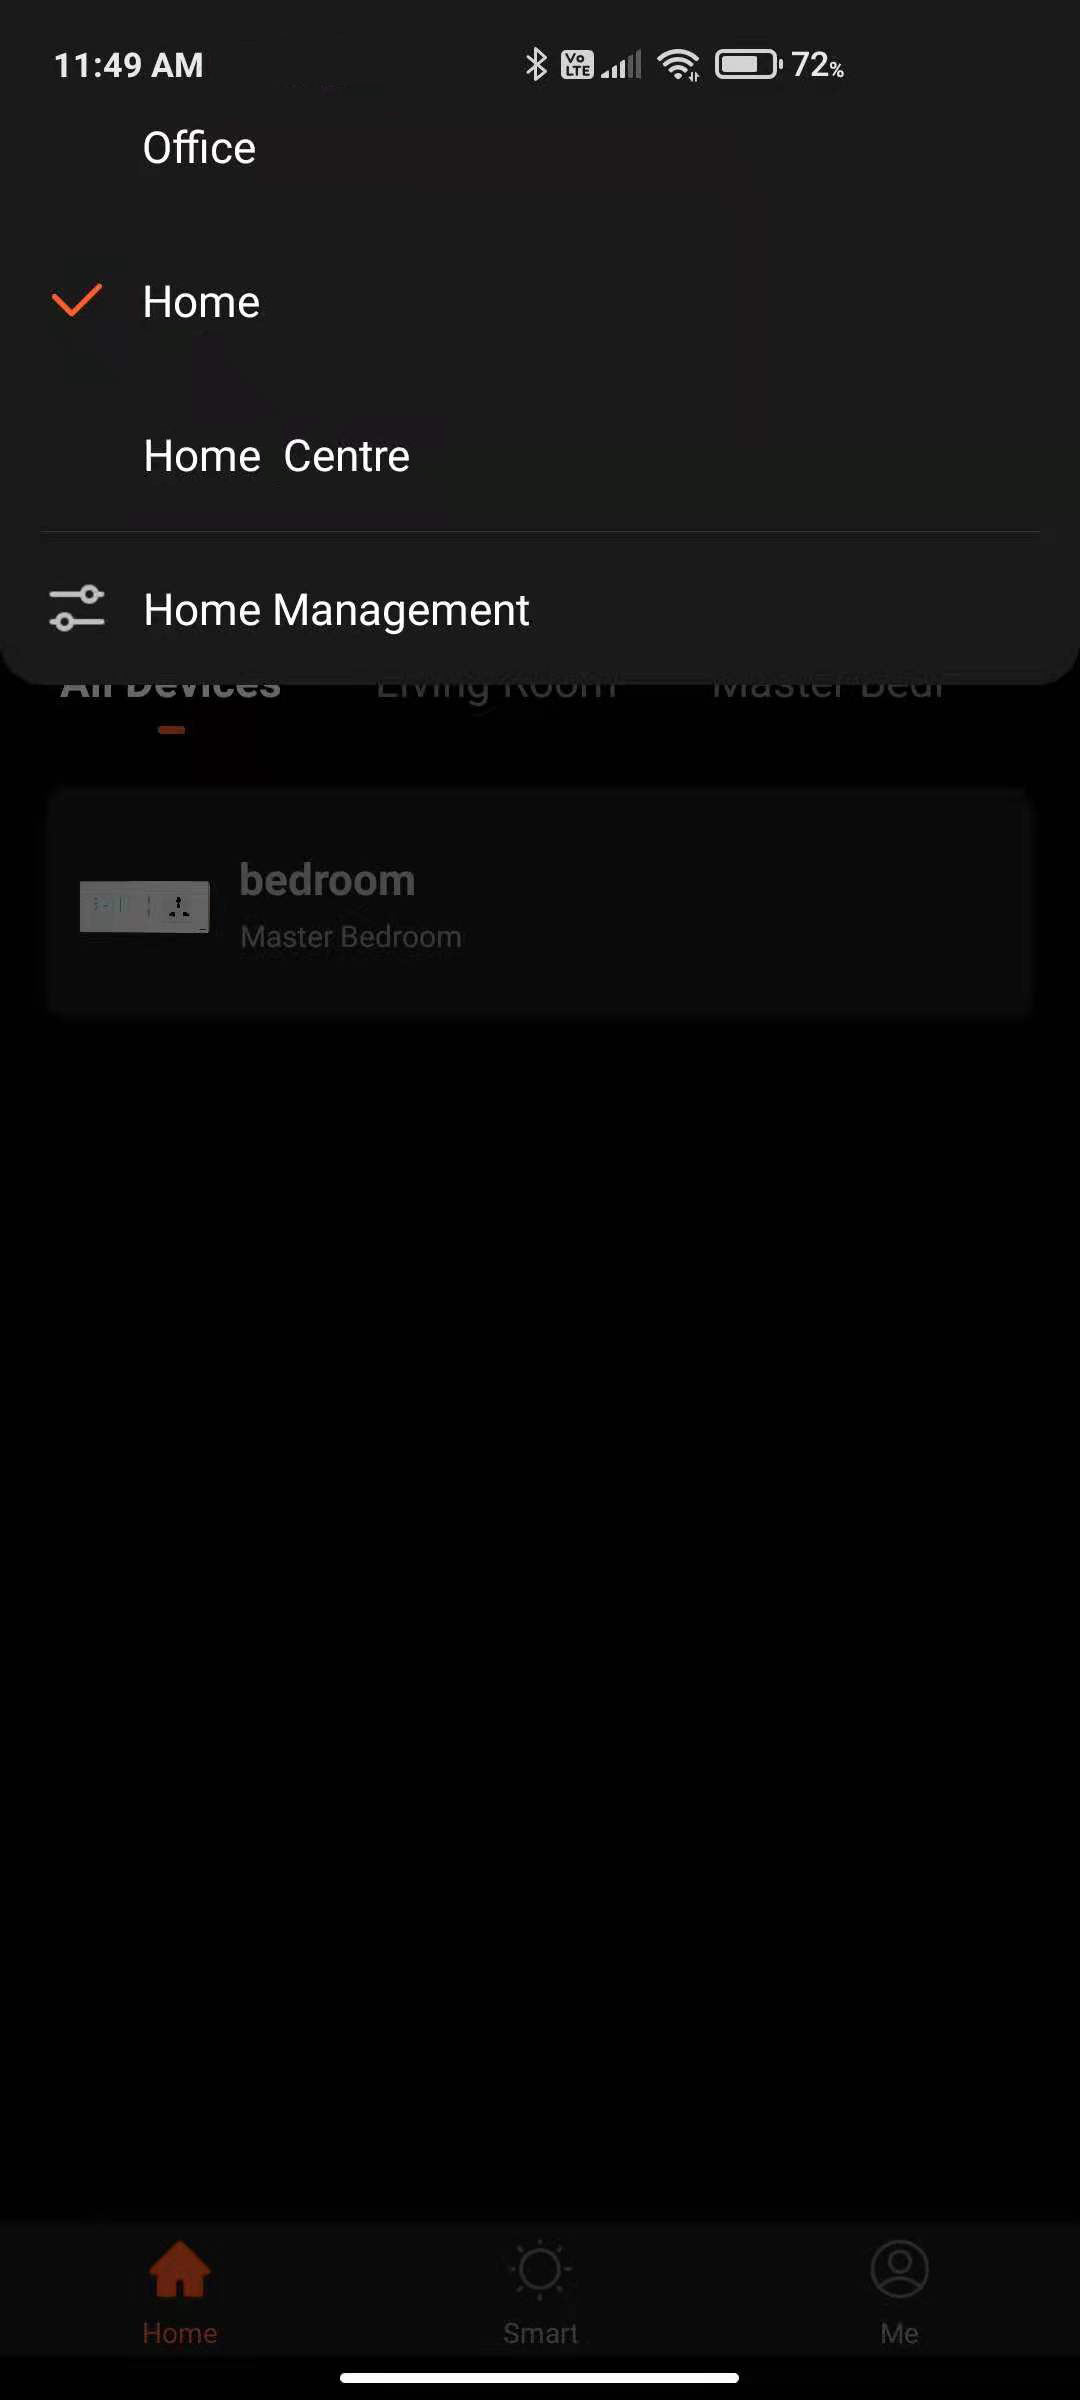
After you complete the home information, go back to the Home page. On the Home page, the information, such as the weather, temperature, and room names is displayed. If you have added more than one home, you can tap the home name in the top left corner to switch to and manage another home.
In the drop-down list, you can tap Home Management to manage your homes and add new homes. An account can control multiple homes. The smart devices in different homes are independent of each other.
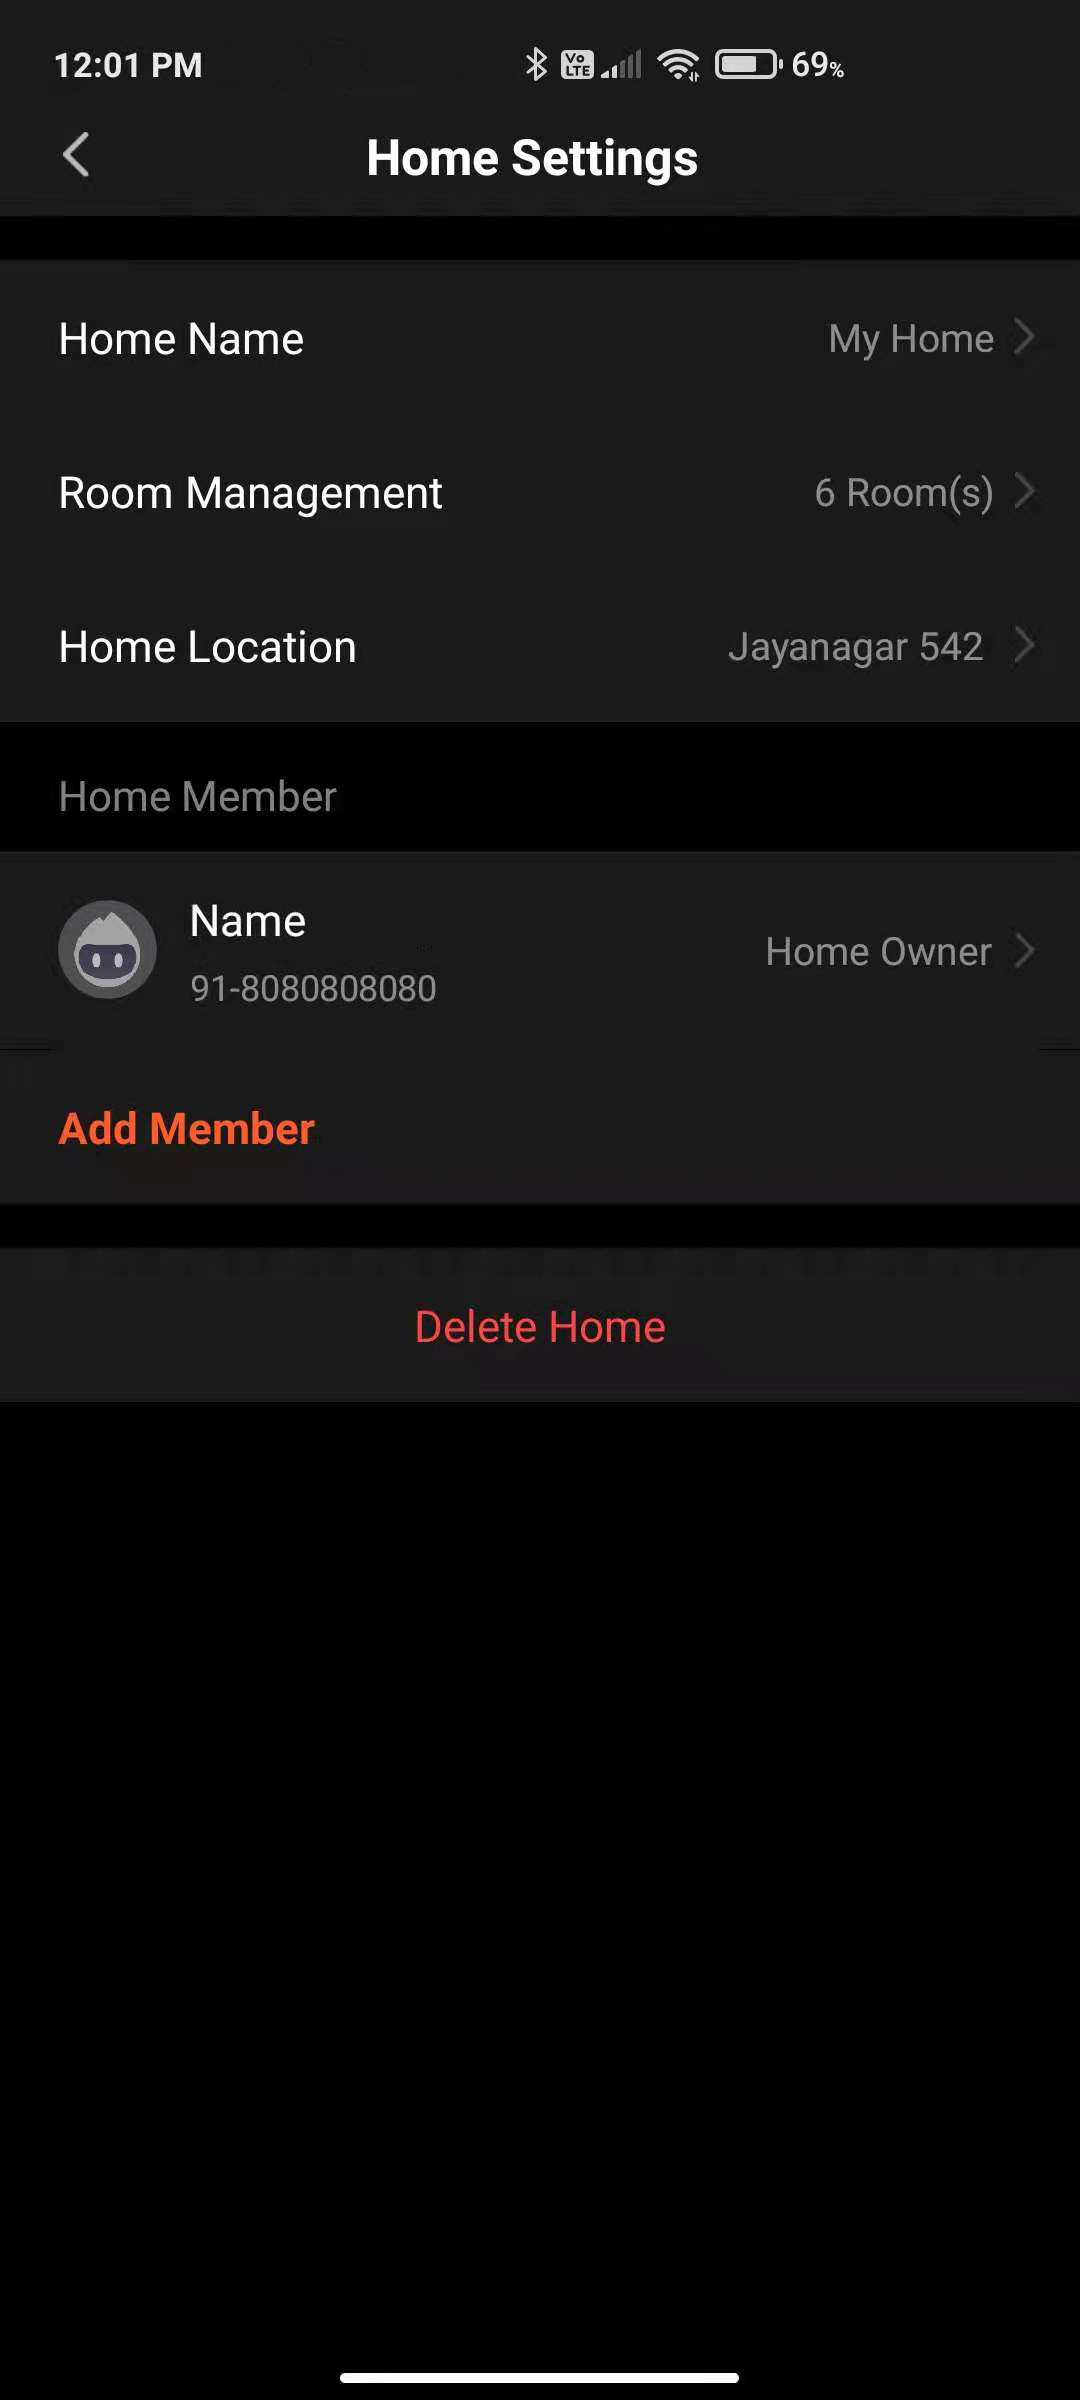
Tap a home name, such as Abseco, and choose Home Management. On the Home Management page, tap the home name, such as Abseco, to go to Home Settings.
Manage Device and Room List
Learn how to manage your devices and room list in Abseco app
View devices
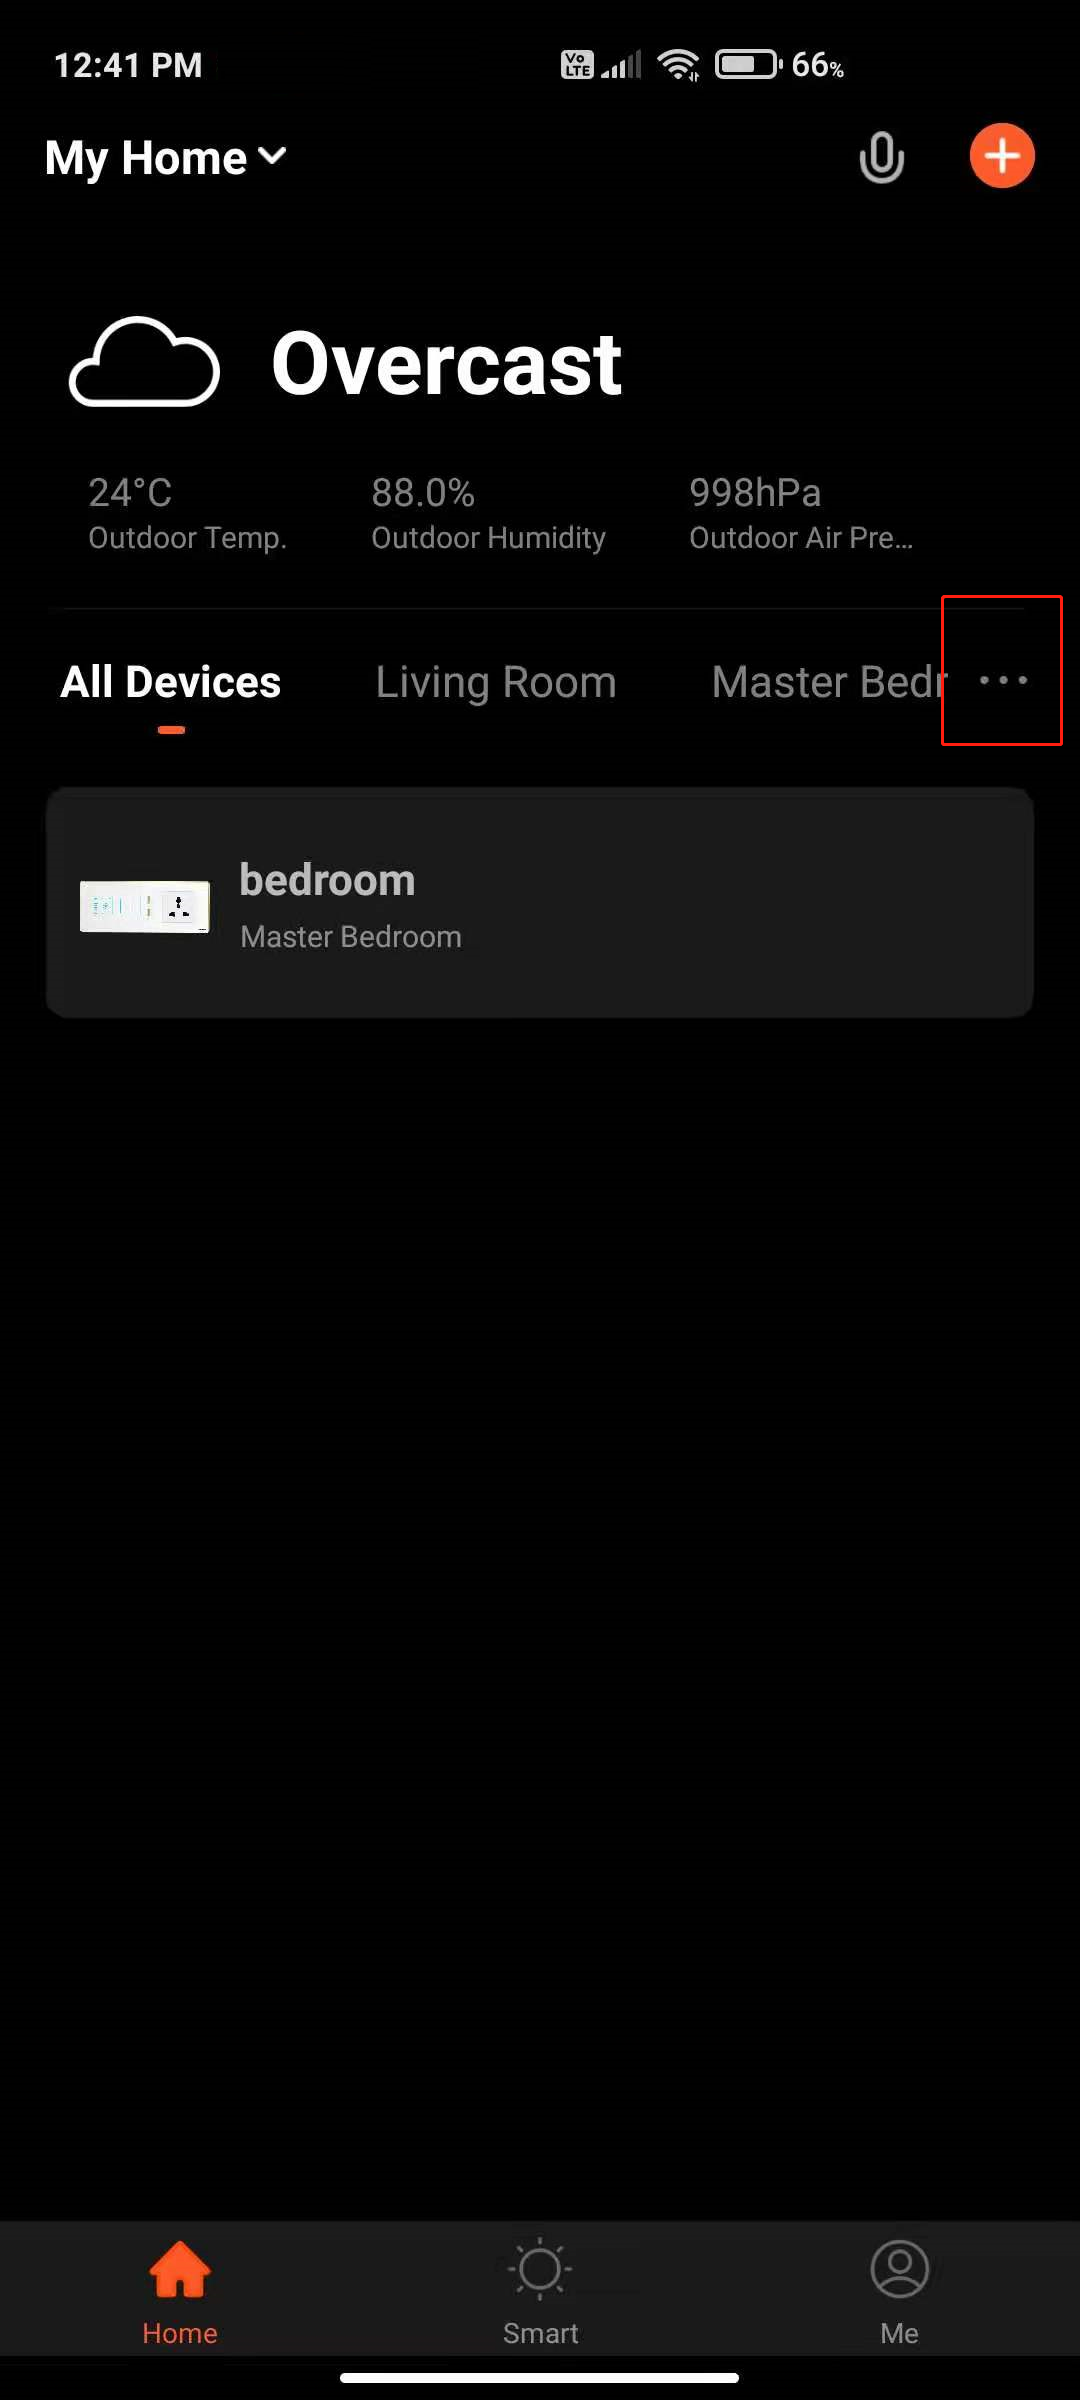
On the Home page, you can view all devices or view devices by room.
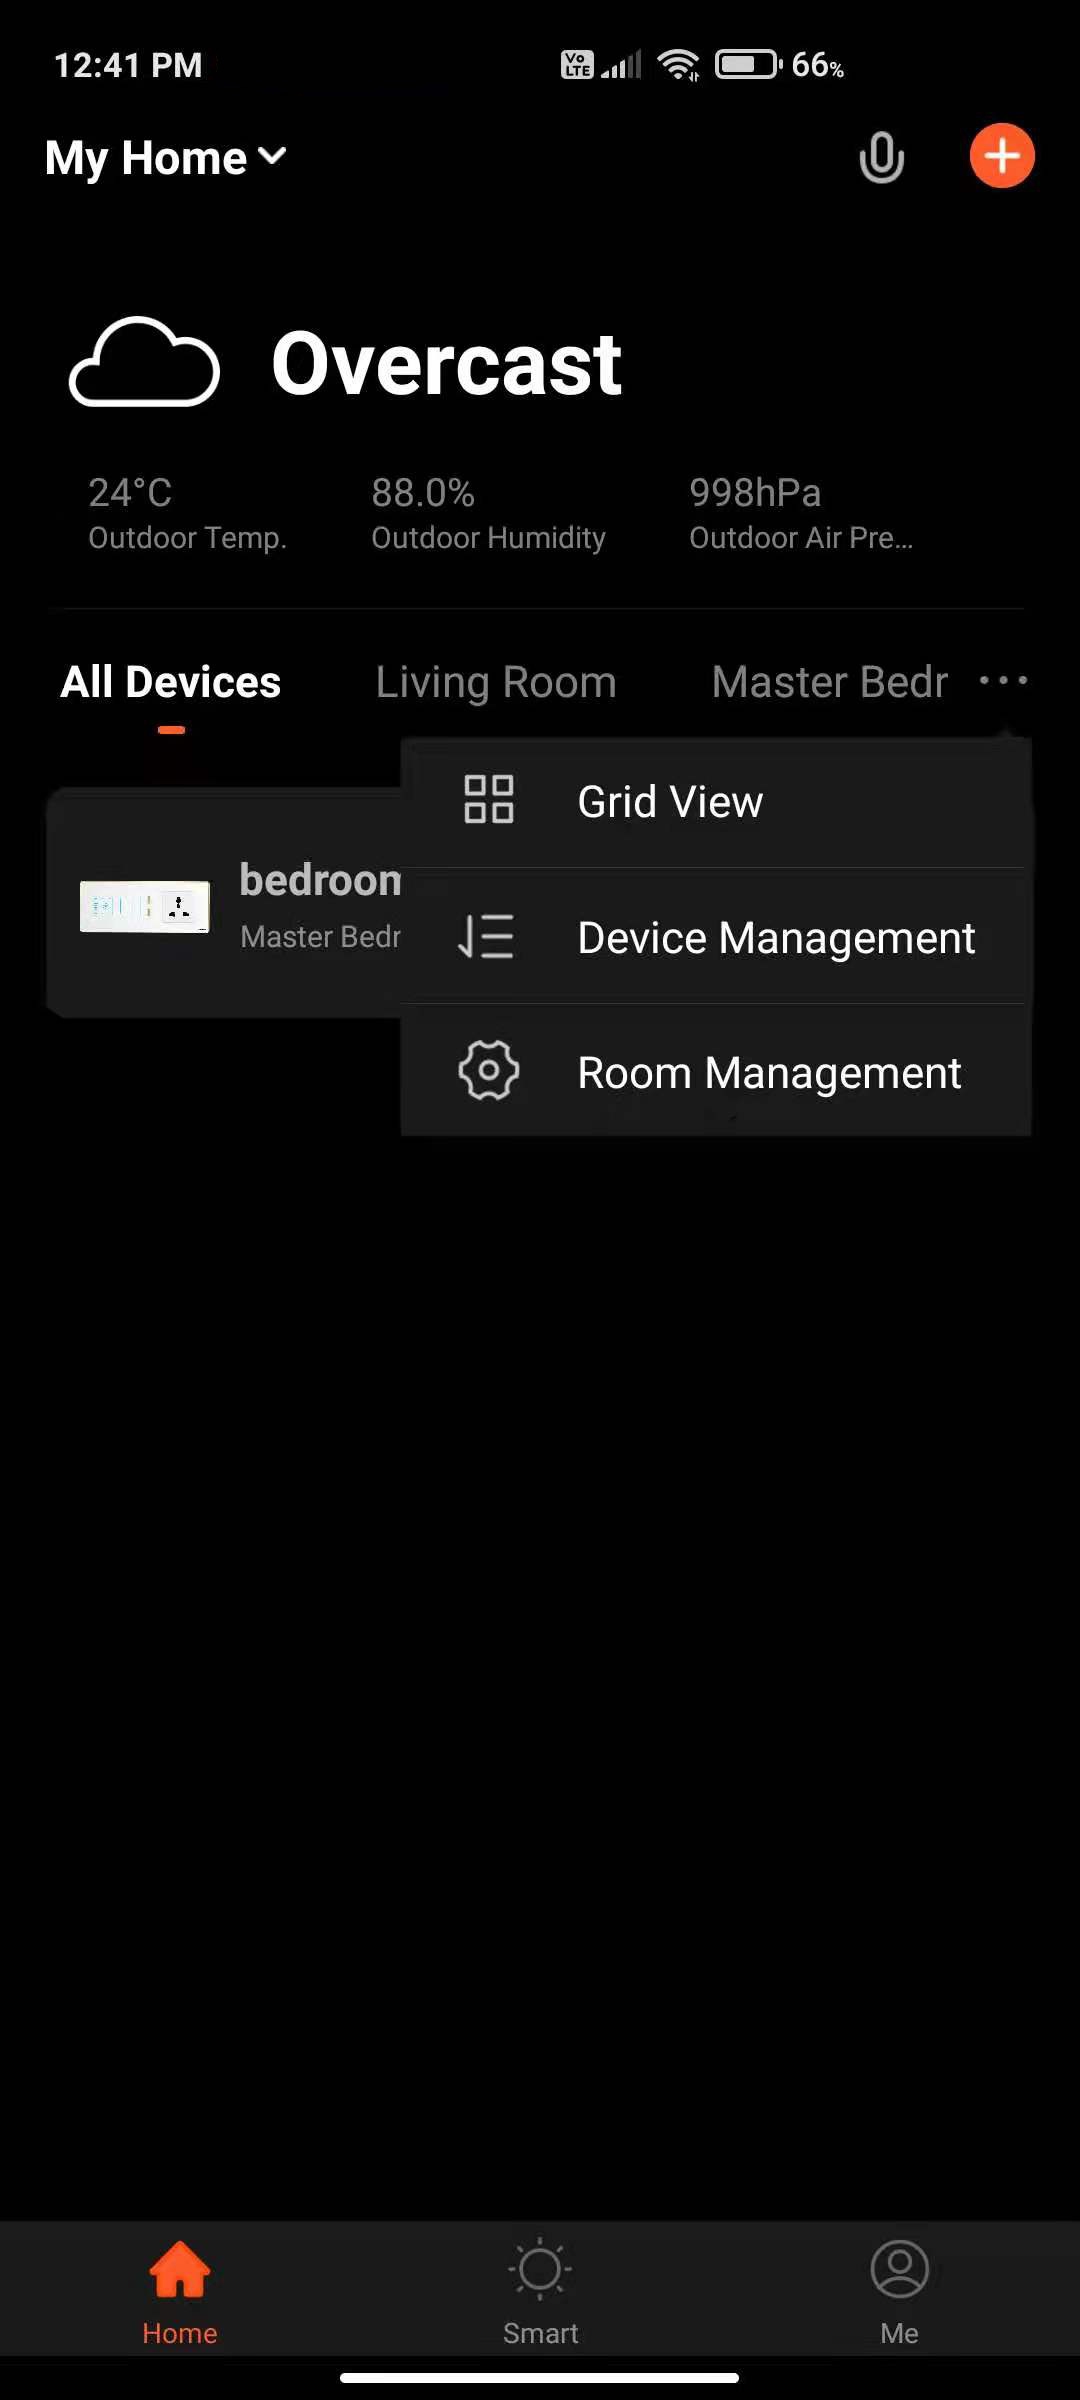
Tap the more (…) icon on the right side. On the menu that appears, you can choose to view devices in list view or grid view.
Manage devices
On the device management page, you can manage the device settings and information.
To manage rooms, tap the more (…) icon next to the room names on the Home page. Tap Device Management. On the Device Management page, you can drag a device icon to sort the display order of the devices. You can delete multiple selected devices at one time.
To change the device icon, device name, and location information, tap the edit icon next to the device icon.
To view the device ID, IP address, MAC address, time zone, and online/offline status, tap Device Information.
To enable or disable the automation function or modify the automation settings, tap Tap-to-Run and Automation.
To share the device with a home member, tap Share Device. On the page that appears, enter the email address or mobile phone number that is bound with the Abseco app account of a home member.
To create a device group for easy group control, tap Create Group. On the page that appears, all devices that have the same model as the current device under the current account are displayed. The devices to be added to the group must have the same firmware version.To create a device group for easy group control, tap Create Group. On the page that appears, all devices that have the same model as the current device under the current account are displayed. The devices to be added to the group must have the same firmware version.
To view FAQs related to the device or send feedback, tap FAQ & Feedback.
To add a shortcut of the device control panel to the home page of your mobile phone, tap Add to Home Screen. You can directly enter the control panel of the device by tapping the device shortcut on the home page of your mobile phone.
To check the device connection status, tap Check Device Network.
To check whether any firmware updates are available, tap Device Update.
To remove the device, tap Remove Device. Two options appear: Disconnect and Disconnect and wipe data. If you tap Disconnect, the device is removed from the device list and automation scenes and tap-to-run scenes that are related to the device become unavailable.
If you tap Disconnect and wipe data, the device is removed from the device list and all data related to the device is erased.
Manage rooms
To manage rooms, tap the more (…) icon next to the room names on the Home page, Tap Room Management. On the Room Management page, tap the management icon in the top right corner. To sort the display order of a room, drag the three-line (≡) icon on the right side of the room name. To remove a room, tap the minus (–) icon before the room.
In the device list, if the device is grayed out, the device is offline. Otherwise, the device is online.
The Home page also displays an overview of key information for some devices. For example, for an air conditioner, water heater, or heater, temperature information is displayed when the device is online. You do not need to tap the device to view such information.
Share Devices
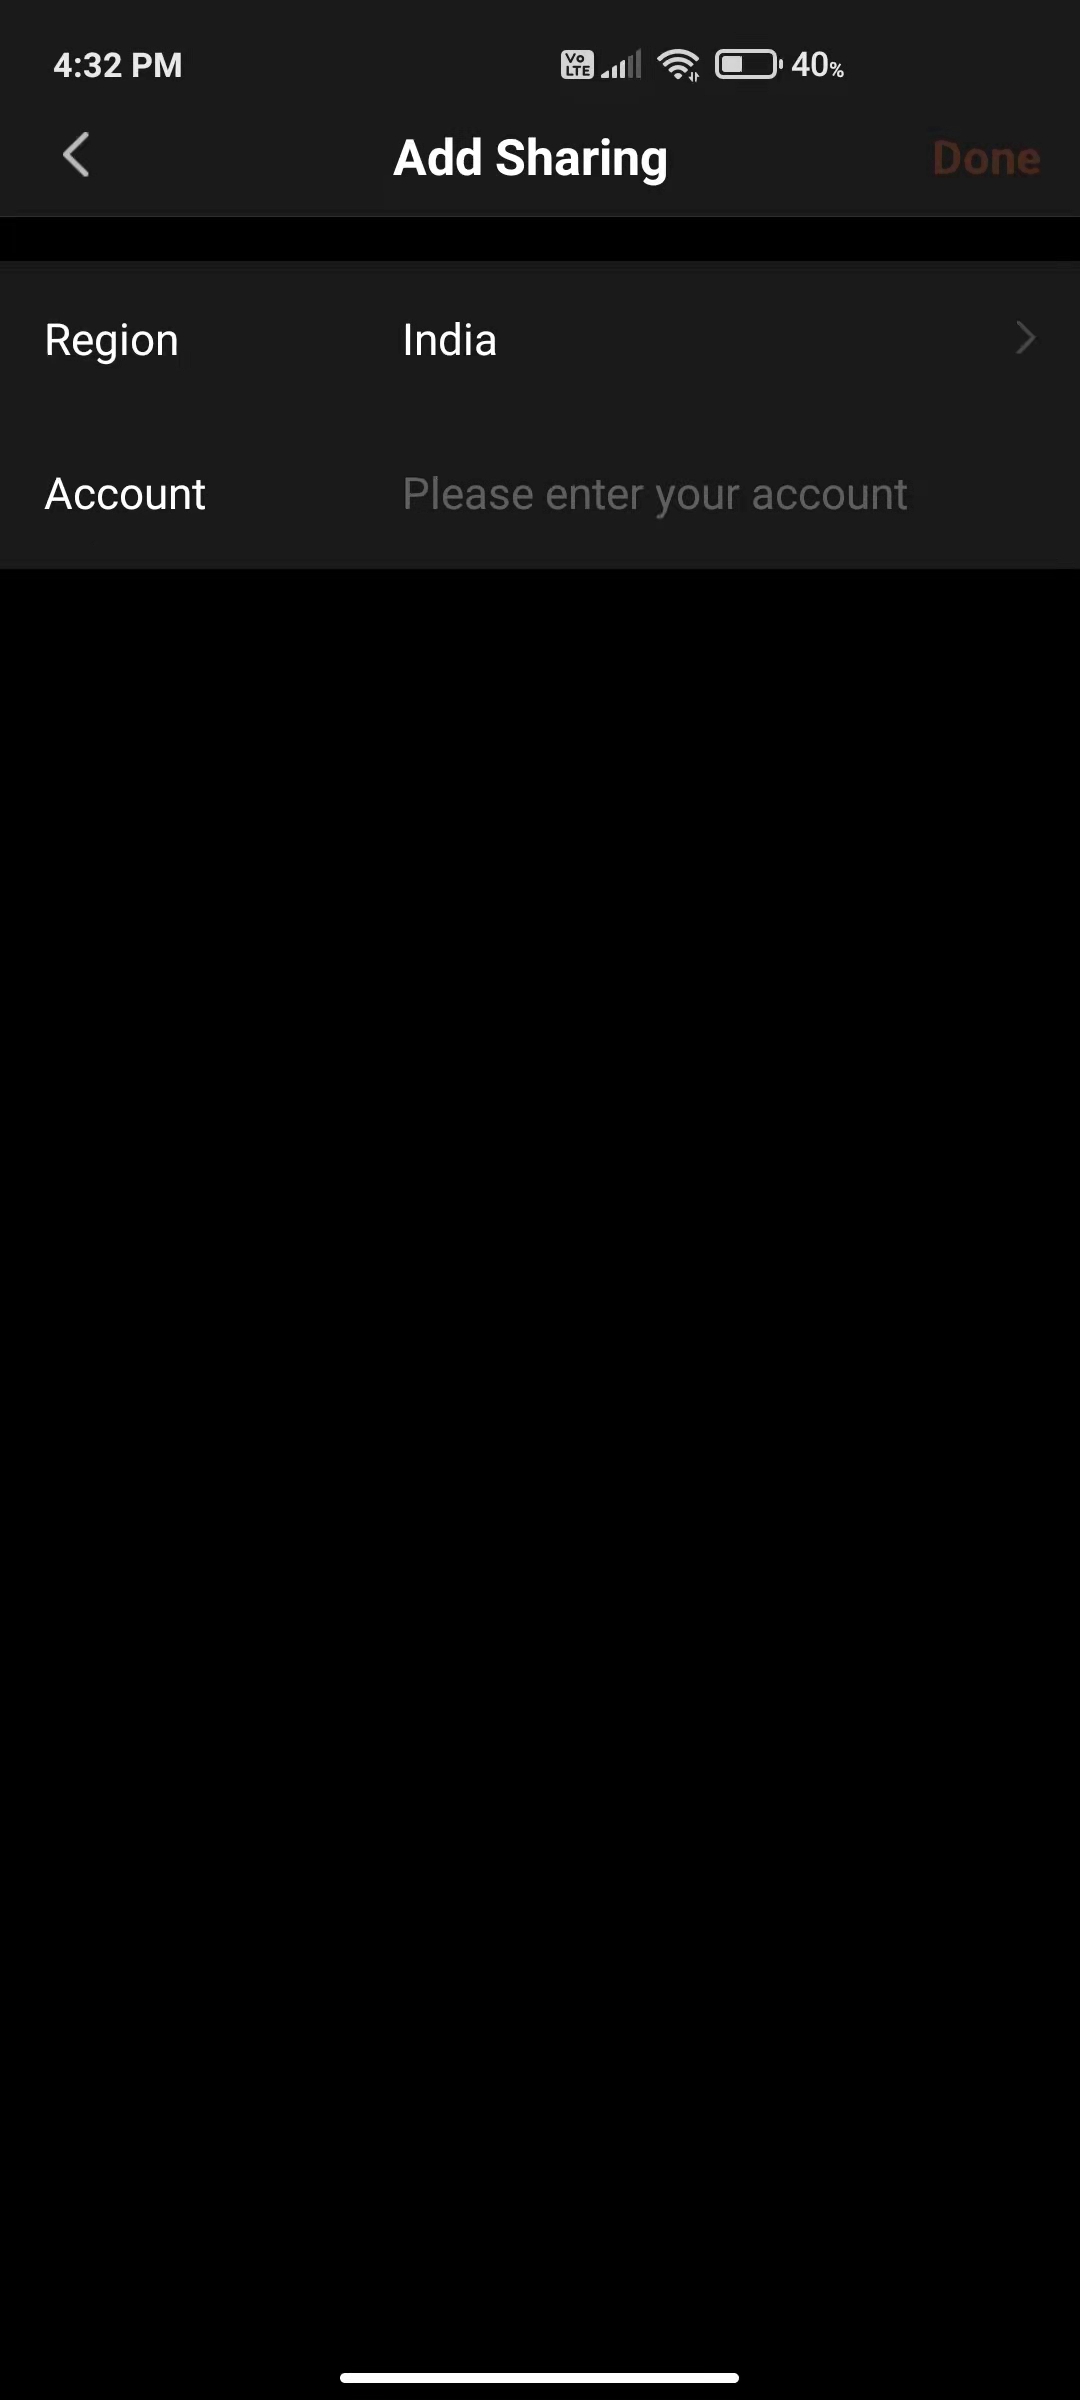
Tap Share Device on the device management page to enter the Device Sharing page.
Tap Add Sharing on the Device Sharing page. On the Add Sharing page, enter the account with which you want to share the devices, and tap Done.
Note : You can only share devices with users that have Abseco app accounts in the same country as your account.
To stop sharing devices with an account, perform the following steps to delete the account: On Android, press and hold the account name and tap Delete. On iOS, press and hold the account name, swipe left, and tap Delete.
Group Control
Tap Create Group on the management page of a selected device.
On the Select Device page, select devices that you want to add to the control group and tap Save. Enter a group name, and tap Confirm. The Select Device page shows all devices of the same model as the selected device.
When the group is created, the app automatically displays the group control panel, where you can control devices in groups.
You can see the created group and control the devices in the group on the Home page.
On the group control page, you can tap the edit icon in the top right corner to manage the group or tap Dismiss Group to dismiss the group.
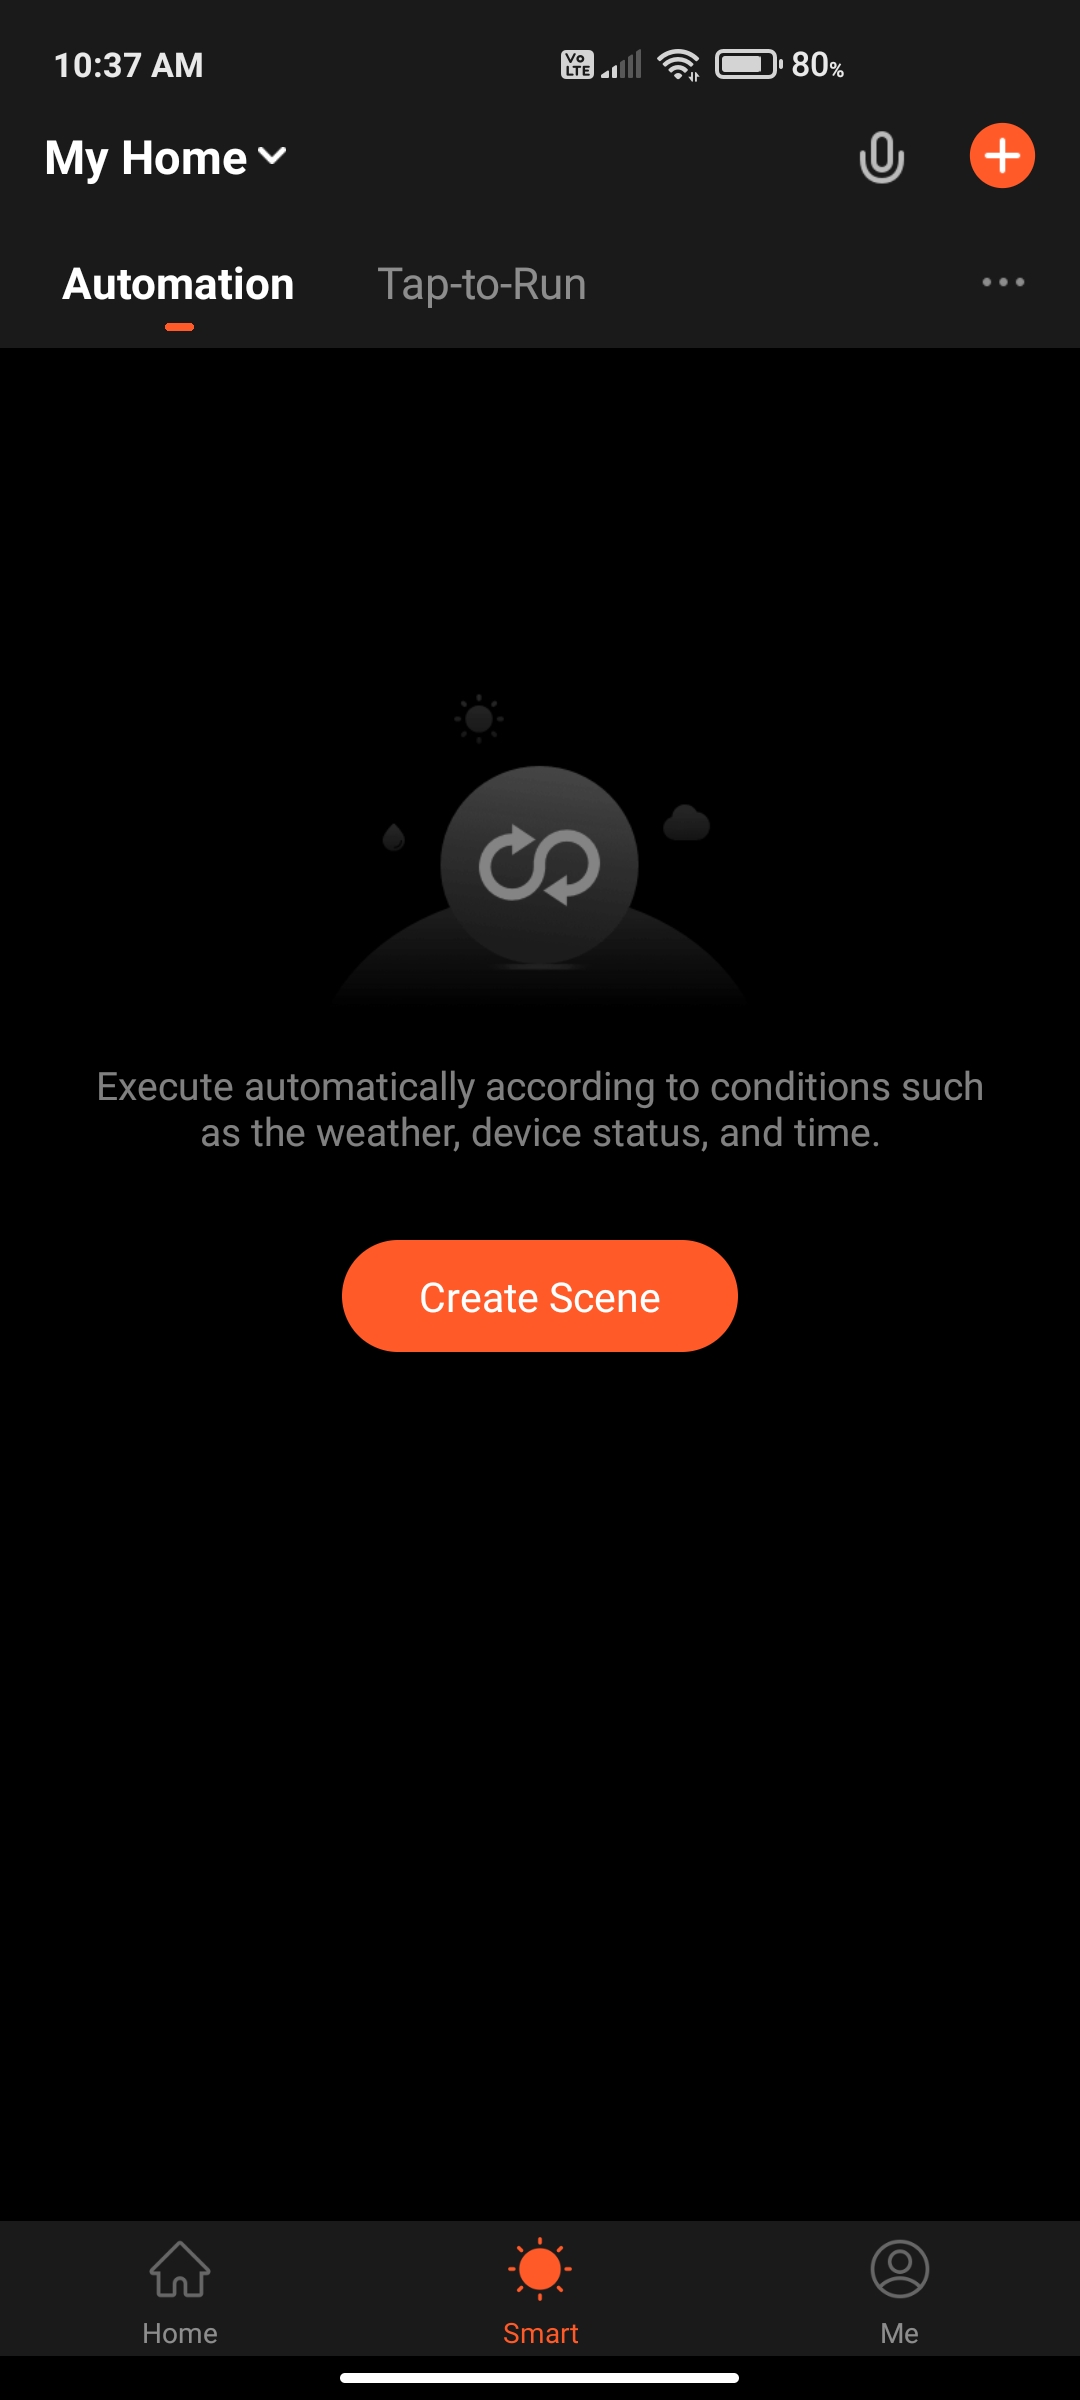
Automation and tap-to-run
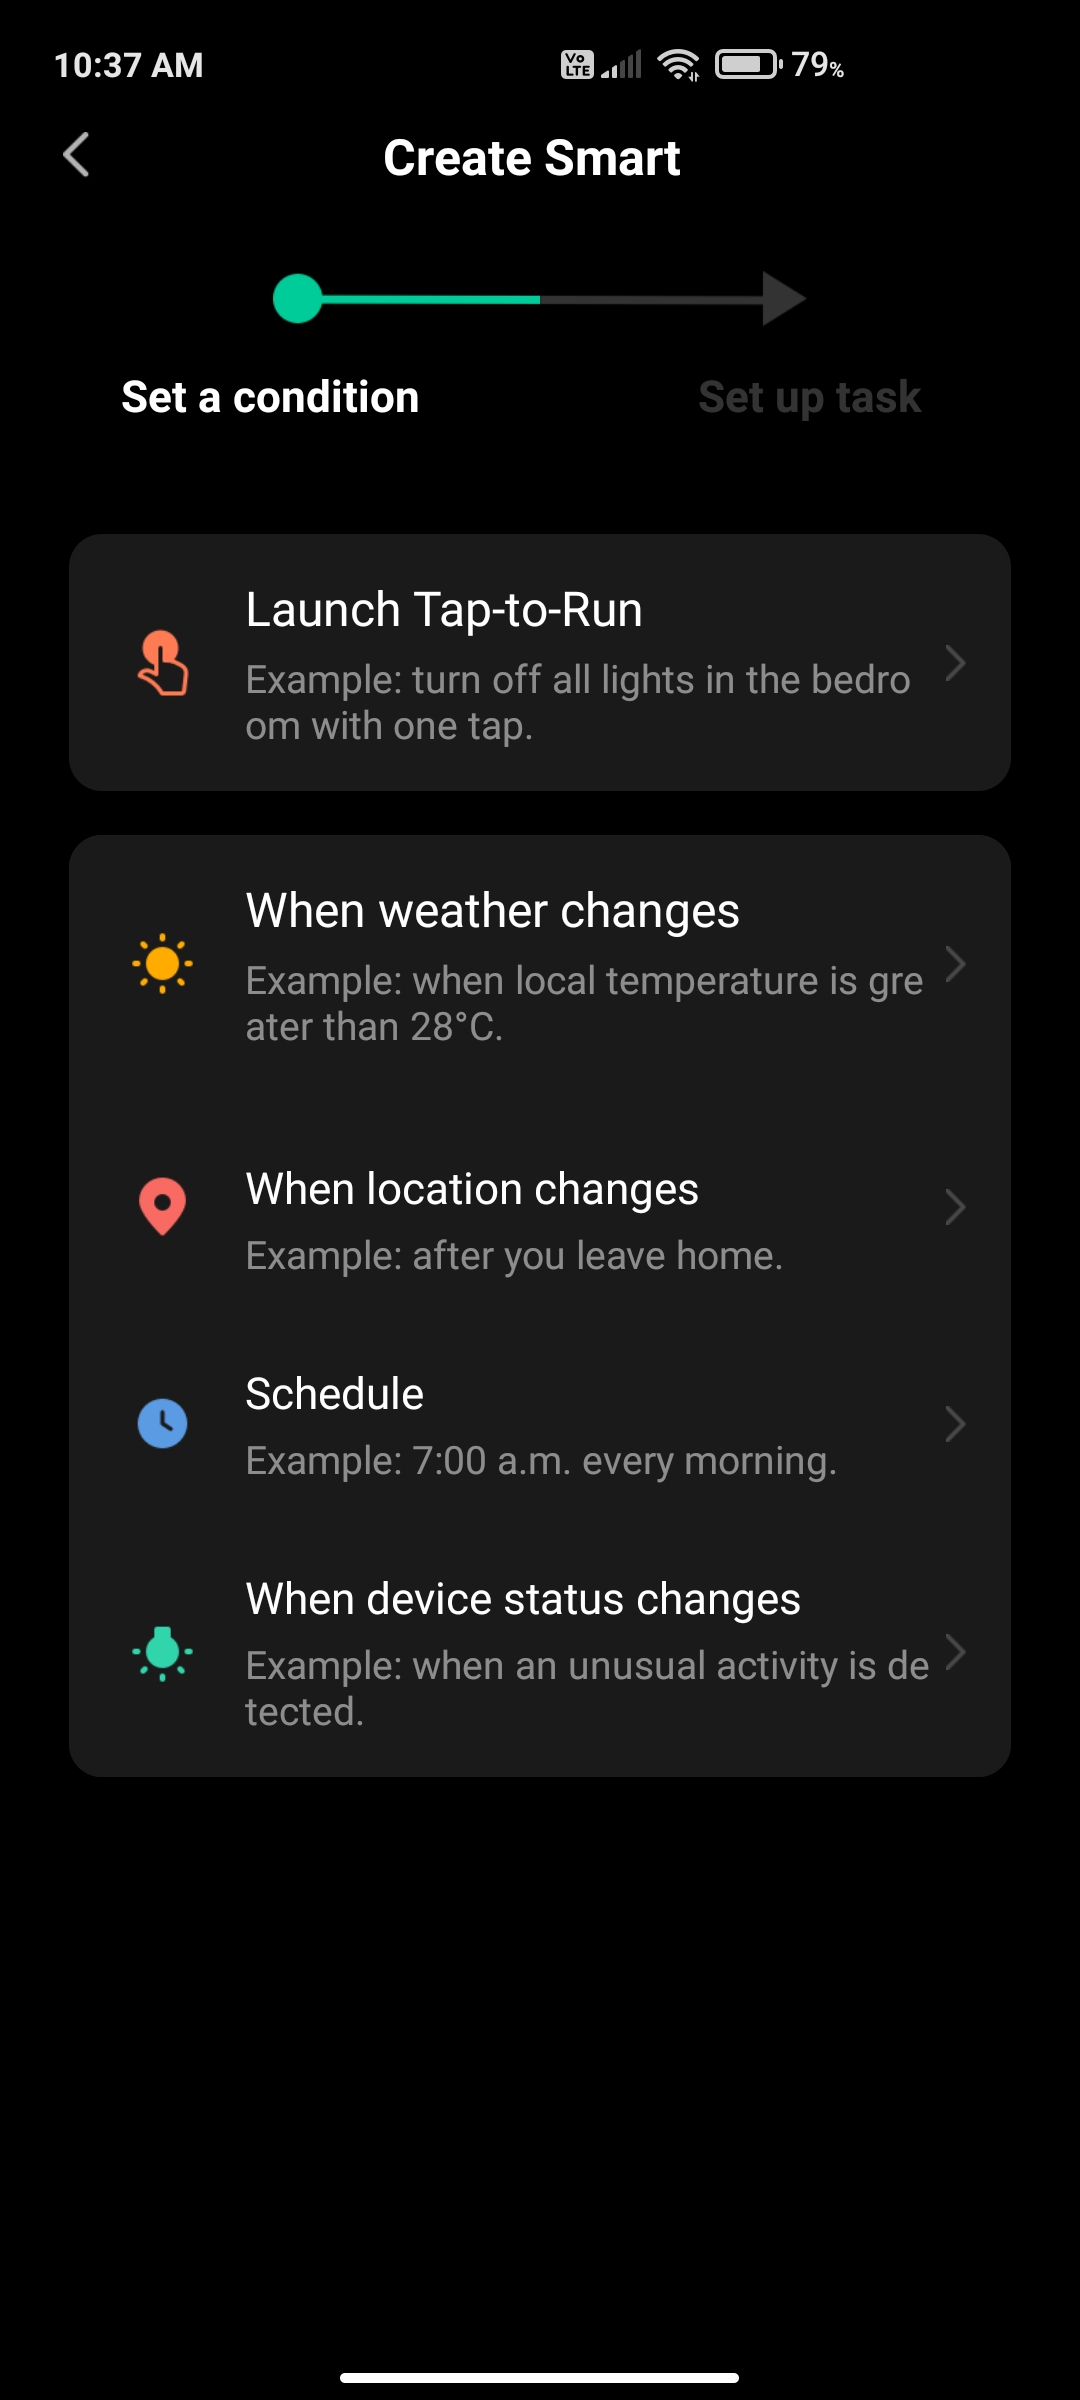
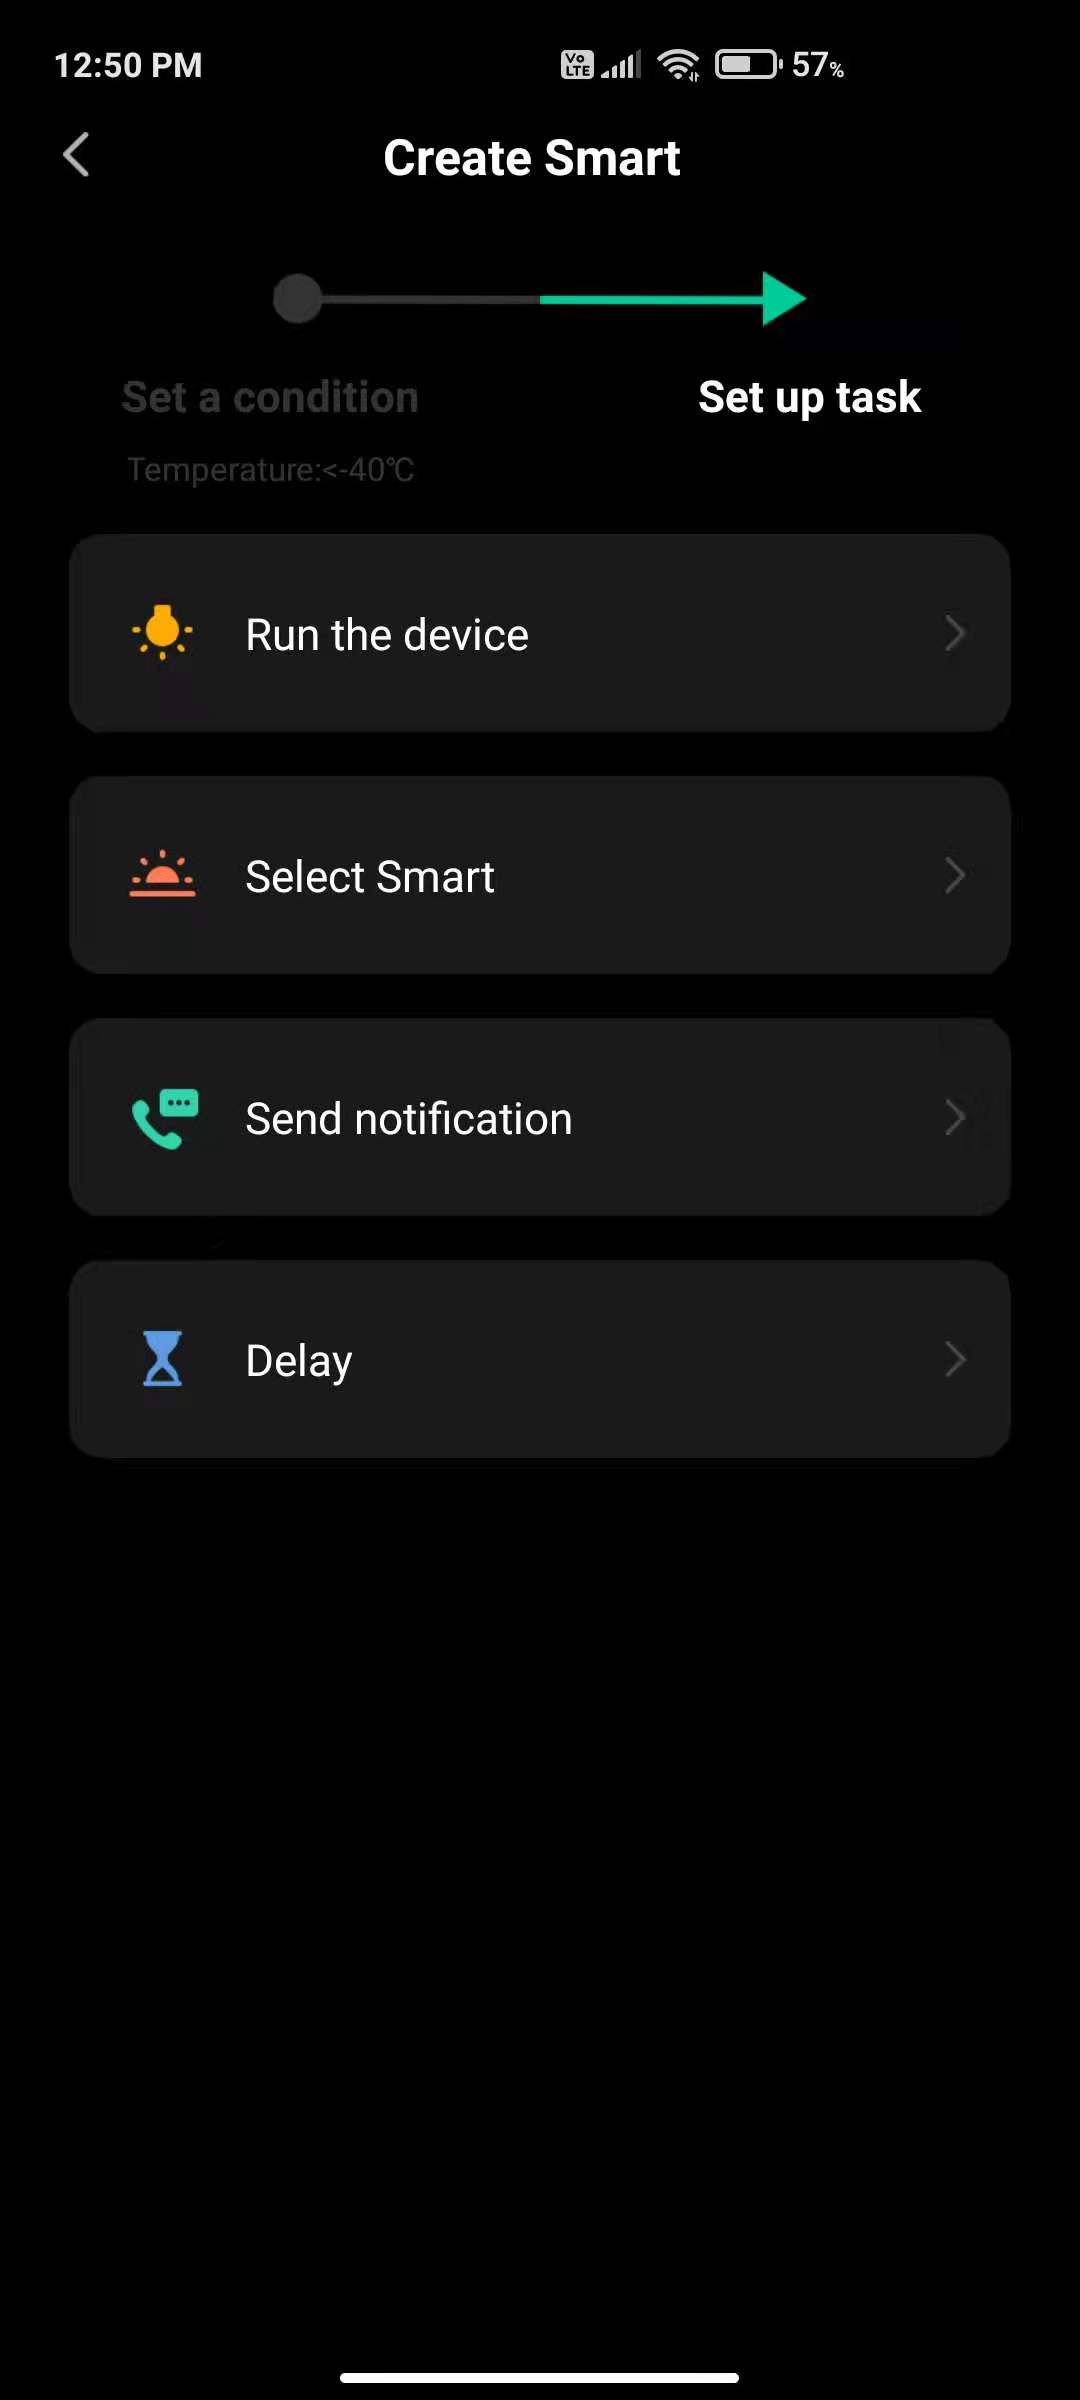
Tap Automation on the Smart page and tap Add “Automatic” or the plus (+) icon in the top right corner to enter the Create Smart page.
Tap Add Condition to add one or more conditions. If you select Launch Tap-to-Run, only the current condition can be added. Tap Add Task to add on or more tasks. You can add multiple Tap-to-Run and Enable or Disable Automation tasks. Tap Name to specify the name of the automation. Tap Effective Period to set a time during which the automation scenes you have created are effective.
On the Automation tab, tap Add “Automatic” to enter the Create Smart wizard.
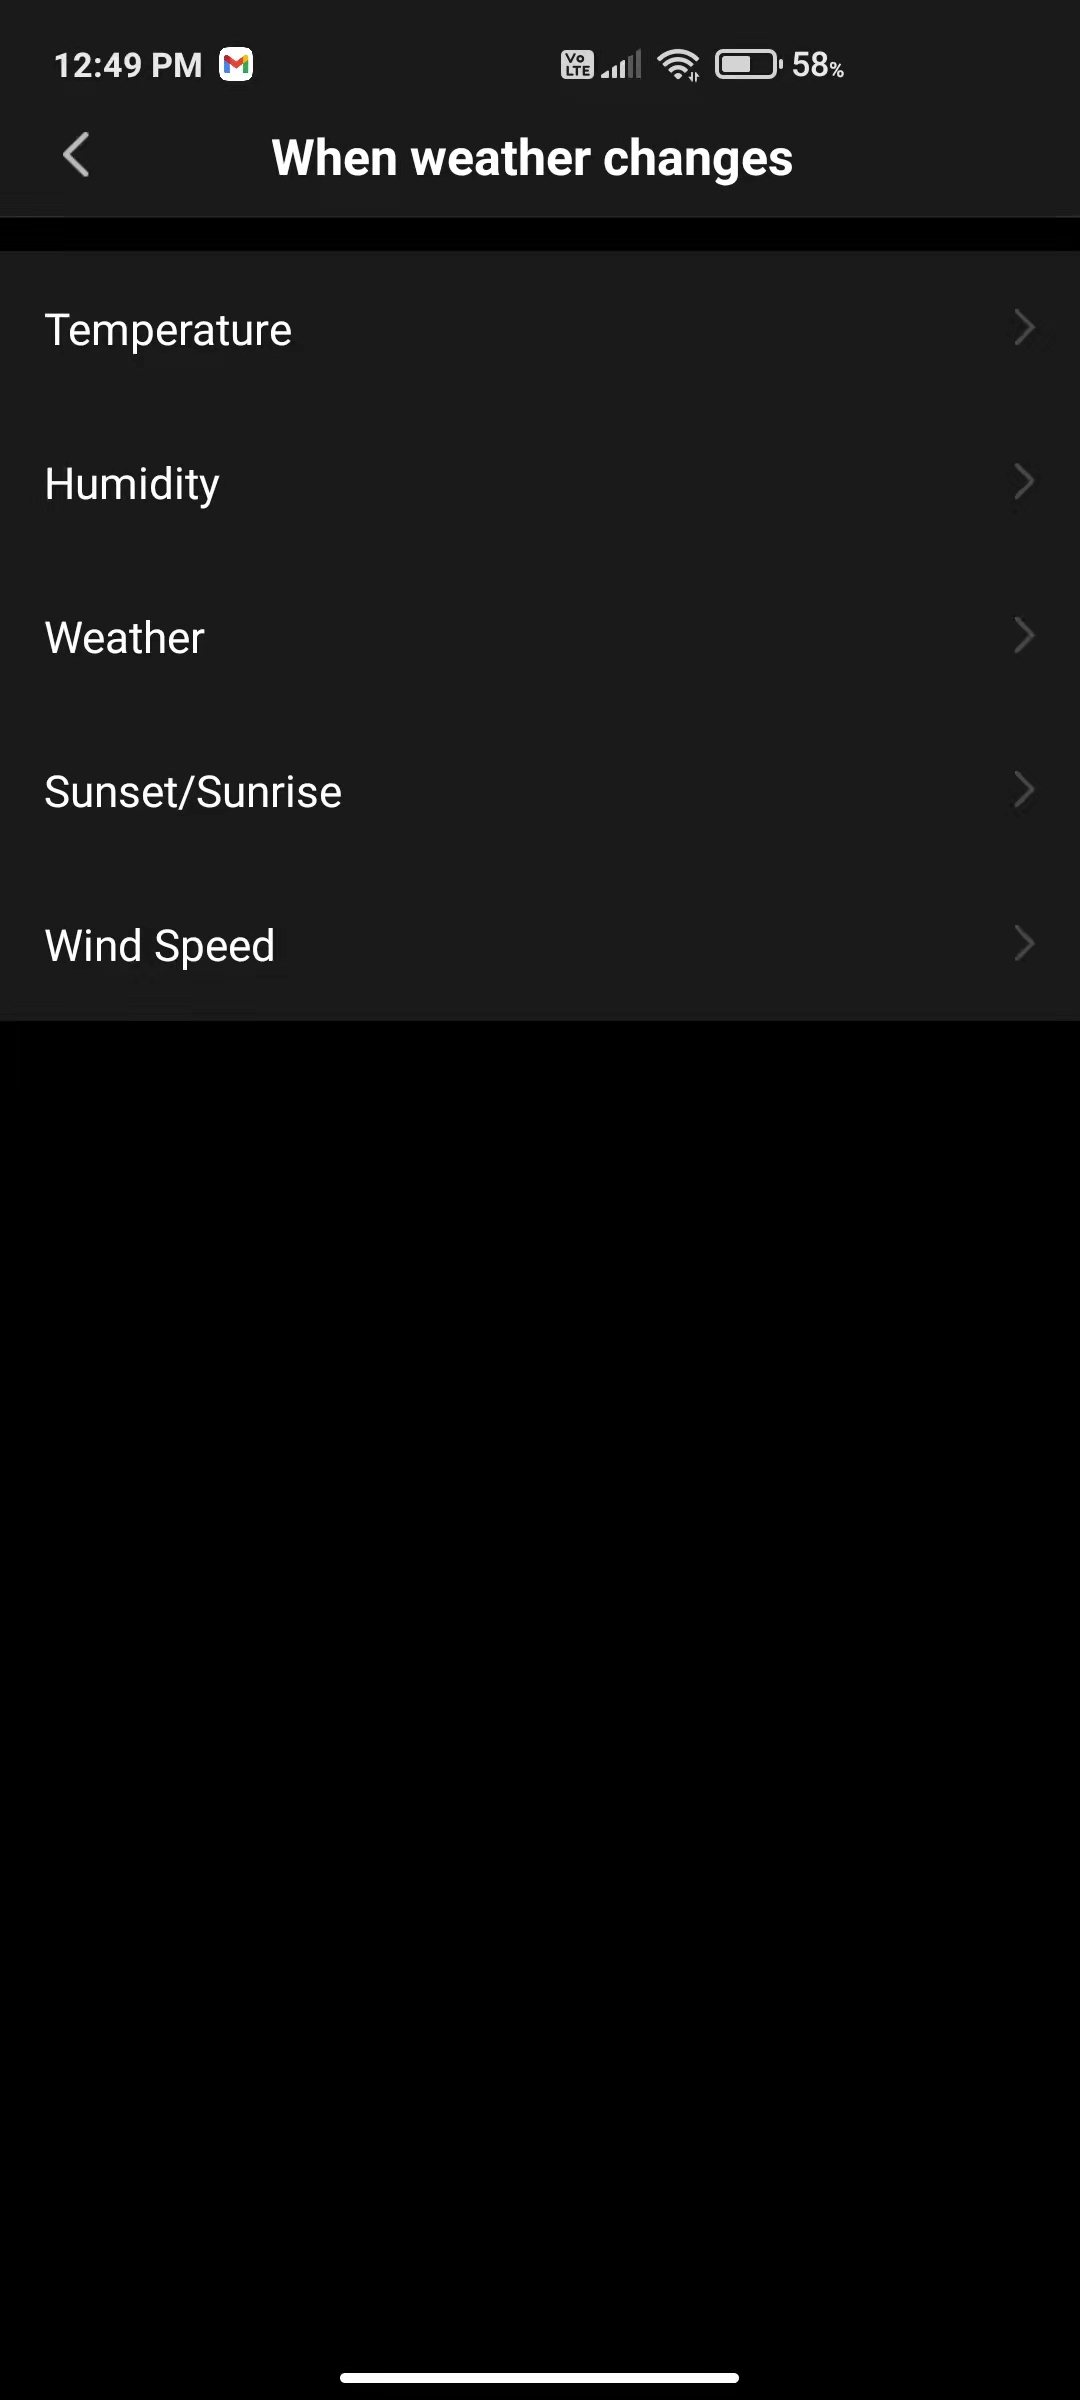
In the Set a condition step, select a trigger condition. In this example, select When weather changes.
Select a specific condition on the When weather changes page. In this example, select Temperature.
On the Temperature page, set a temperature and tap Next in the top right corner.The Set up task step appears.
In the Set up task step, select a task. In this example, select Execution equipment.
Select a device. In this example, an air conditioner is selected.
Set one or more functions on the Select Function page. In this example, the device is set to on, the temperature is set to 26°C, the working mode is set to Cold, and the wind speed is set to high. Tap Next in the top right corner.
On the page that appears, tap Save to save the condition and task settings.
To add more conditions, tap the plus (+) icon in the top right corner.
Set an effective period. In this example, the effective period for the air conditioner is set to 7:00 PM – 03:00 AM.
Select sunrise/sunset condition
On the Automation tab, tap Add “Automatic” to enter the Create Smart wizard.
In the Set a condition step, select a trigger condition. In this example, select When weather changes.
Select a specific condition on the When weather changes page. In this example, select Sunset/Sunrise.
On the Sunset/Sunrise page, select sunset, sunrise, or a time offset to the sunset or sunrise. Tap Next.The Set up task step appears.
In the Set up task step, select a task. In this example, select Execution equipment.
Select a device. In this example, an air conditioner is selected.
Set one or more functions on the Select Function page. In this example, the device is set to on, the temperature is set to 26°C, the working mode is set to Cold, and the wind speed is set to high. Tap Next in the top right corner.
Set leave/arrive condition
On the Select Condition page, tap Leave or Arrive (beta). A Leave or Arrive condition triggers specified actions when you arrive at or leave a place. To set a Leave or Arrive condition, you must authorize the app to always use your geographic location. Currently, this feature is not available on Android mobile phones.
Set a location and tap Next. This function allows you to control your device to run the preset task within 110m to 1023m of your location.
Create scenes from templates
The app provides some recommended out-of-box automation and tap-to-run scenes based on the devices you add. These recommended scenes make it easy for you to control your devices.
To create a scene by using available templates, tap Create scenes from templates on the Create Smart page. Select recommended automation scene settings.
To add a task, tap Add Task or the plus (+) icon behind Task on the Smart Settings page.
On the Select Task page, you can select one of the following task types: Launch Tap-to-Run, Enable or Disable Automation, Send Notification, Time to left, and Device.
For example, you can set a device on/off control task or a scene-based automation task.
You can set a period of time during which the automation scenes you have created are effective.
For example, if you define a scene where the nightlight is automatically turned on when the human motion sensor detects the presence of humans, you can select night as the effective period. In this case, the nightlight will not be automatically turned on in the daytime.
You can create an automation scene to implement automated device control. The following figure shows an example automation scene with conditions and actions set.
The app supports four automation types:
Linkage among devices: For example, when the air conditioner is turned on, the diffuser and air purifier are automatically turned on.
Linkage between external environmental conditions and devices: For example, when the ambient temperature is higher than 29°C, the air conditioner is automatically turned on.
Scheduled actions: For example, the curtains are opened automatically at 8:00 o’clock every morning.
Geofencing: Specific actions are triggered when you arrive at or leave a place. For example, the air conditioner and water heater are automatically turned on when you arrive home.
To select notification methods, perform the following steps:
On the Smart page, tap the plus (+) icon in the top right corner.
In the Set a condition step, set a trigger condition.
In the Set up task step, tap Send notification. The Select Notification Method page appears.
On the Select Notification Method page, select one or more available notification methods: Message Center, Phone Notification, and Message Notification. If you have not activated the Phone Notification and Message Notification services, you can only select Message Center.
Selected notification methods and trigger conditions are displayed together on the Automation tab.
On the Tap-to-Run tab, tap Add “Tap-to-Run” or the plus (+) icon in the top right corner to enter the Create Smart wizard.
In the Set a condition step, tap Launch Tap-to-Run.
If you select Launch Tap-to-Run, you cannot select Launch Tap to Run on the Executive intelligence page and Send notification reminder in the Set up task step.
Preset automation is required if you select Enable or Disable Automation as the task when you set the scene.
If you tap Enable or Disable Automation, a list of available automation scenes appears. You can enable or disable a scene by tapping it. Tap Next, enter the scene name, and tap Save. The Effective Period function is not available for tap-to-run scenes.Click for more introduction
Local gateway support for tap-to-run scenes
The new version of the Zigbee gateway supports locally running automation scenes. If all tasks and devices involved in an automation scene use the new Zigbee gateway, the tasks and devices can be run based on scene settings, even if the network connection fails.
Zigbee gateway linkage data backup and recovery
The Abseco app supports Zigbee gateway linkage data backup and recovery. This means that even if the Zigbee gateway is removed, the information about the previous linkage scenes is automatically reserved. When the devices are reconnected to the network by normal pairing or automatic pairing, the linkage information is recovered.
Add, modify, and delete scenes
On the Smart page, tap the more (…) icon in the top right corner and tap Manage to edit and sort the tap-to-run or automation scenes. Created tap-to-run and automation scenes are displayed on the Tap-to-Run tab and the Automation tab respectively.
On the page that appears, sort tap-to-run or automation scenes. To delete a tap-to-run or automation scene, swipe the scene to left and tap Delete. On the Abseco app for iOS, tap the minus (–) icon next to a scene name to delete a scene.
On the Tap-to-Run or Automation tab, tap the more (…) icon in the top right corner of an existing scene module to enter the Edit page.
Tap and hold a condition or task and then swipe left to delete a condition or task.
Tap the plus (+) icon behind Condition or Task to add a condition or task.
To delete the scene, Tap Delete at the bottom of the Edit page.
Tap an automation scene module to edit or delete the scene in the pop-up window.
Add tap-to-run scenes to Siri
On the Smart page, tap Add to Siri in the lower right corner. The Siri Shortcut page appears, displaying all supported tap-to-run scenes.
Select a tap-to-run scene that you want Siri to trigger.
On the settings page for the tap-to-run scene, specify trigger words and tap Add to Siri. When you say the trigger words to Siri, Siri tells the Abseco app to trigger a tap-to-run scene. Note: The Add to Siri function is supported only on iOS 12.0 or later.
Add tap-to-run scenes to Siri
On the Smart page, choose … > Logs in the top right corner. The Logs page appears, displaying the scene-related logs in the recent seven days in reverse time order.
Tap a log to go to the Edit page, where you can modify the scene settings.
Logs help you monitor the status of your devices. If a device fails to function based on the scene automation settings, an alarm message is sent to the notification center and the failure log is stored.
You can view the failure log to check devices that fail to be automated based on the scene settings.
Run scene tasks in a LAN
When devices involved in scenes are connected to a LAN but not the internet and the scene conditions are met, automation tasks in the scenes are run in the specified sequence to control the involved devices in the LAN.
Home
On the Home page, you can perform the following operations:
Tap the microphone icon to use voice commands to control devices.
Tap the home name in the top left corner to switch between homes or add a home.
Tap the weather and environment information section to go to the detailed weather and environment information page, where you can sort the weather and environment indicators. The Home page only displays the first three weather and environment indicators.
Tap the plus (+) icon to add devices.
Tap a tap-to-run scene to trigger a scene.
Tap a room name to view the status of smart devices in the room.
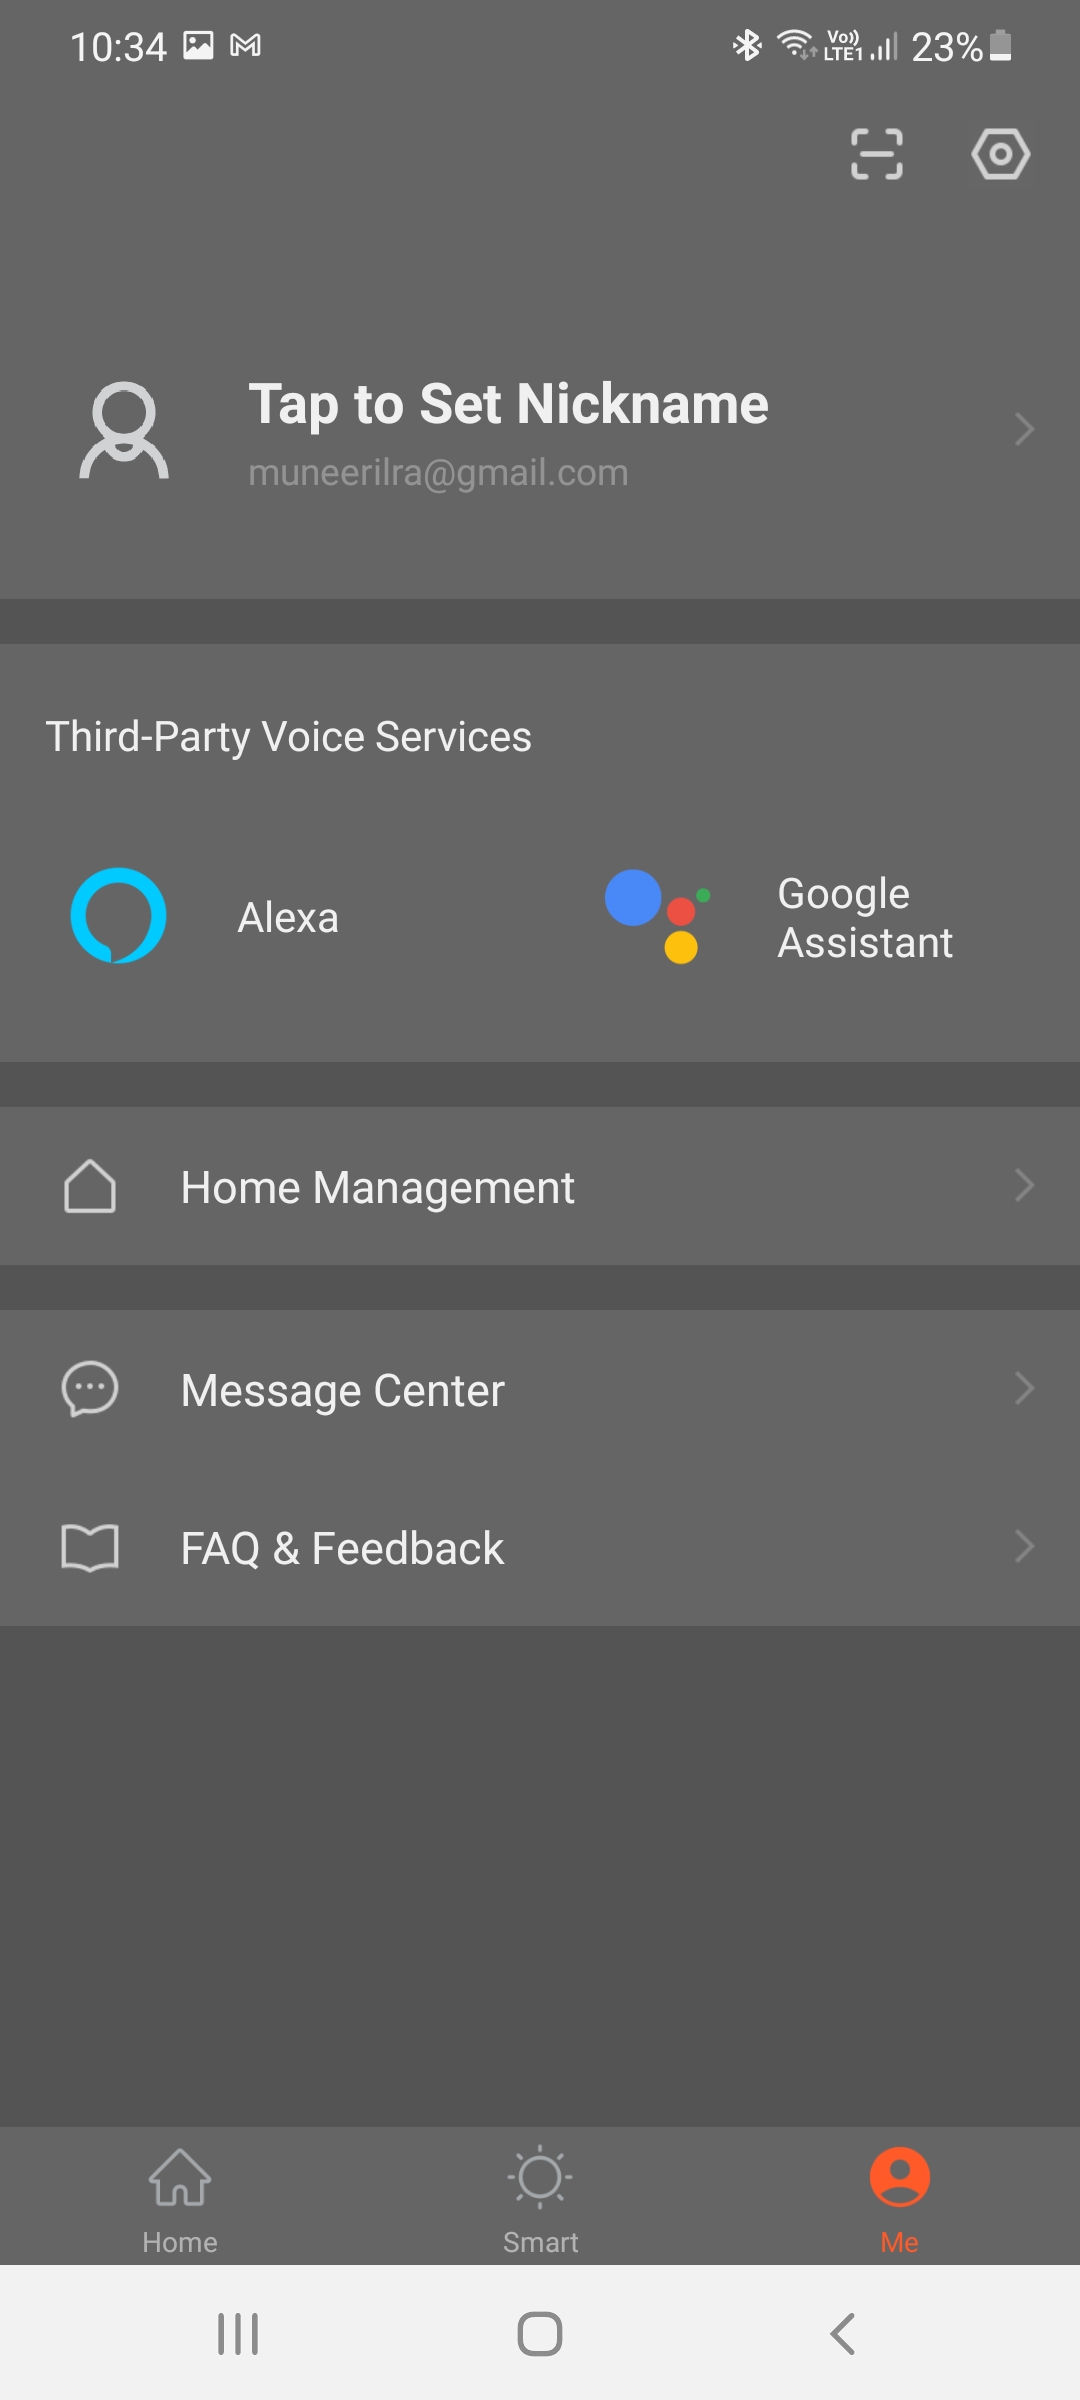
Me
The following sections and icon are displayed on the Me page:
Third-Party Integration: The Abseco app supports seven third-party voice assistants.
Home Management: You can tap Home Management to manage your homes and home members.
Message Center: Three types of messages are displayed in Message Center: Alarm, Home, and Bulletin. You can specify a do-not-disturb period for these messages.
FAQ & Feedback: After you tap FAQ & Feedback, the FAQs & Feedback page appears. On this page, you can tap My feedback in the top right corner to view your feedback records, view FAQs and FAQ categories, report your issues, and enter keywords to search for FAQs.
Featured: The featured services include Cloud Storage for Cameras, Phone Notification, and Message Notification.
HomeKit Information: Your HomeKit-compatible devices can also be controlled by using the Abseco app.
Watch: You can tap Watch to check available devices and tap-to-run scenes. The Watch section appears in the Abseco app only when your Apple Watch is bound to your iPhone.
Settings icon: You can tap this icon to go to the Settings page. The Settings page displays the following sections and buttons: Sound, App Notification, About, Network Diagnosis, Upload Log, Clear Cache, and Log Out. The Upload Log section is displayed only in the Abseco app for iOS.
Third-party integration
On the Me page, tap More in the top right corner of the Third-Party Integration.
On the Third-Party Integration page, you can bind the app with a third-party voice assistant
Message center
Three types of messages are displayed in Message Center: Alarm, Home, and Bulletin:
Alarms include device alarms, automation-related notifications, and alarms of scheduled execution failures.
Home-related messages include messages about adding or removing home members, removing a home, setting a home member as the administrator, adding devices, and sharing devices.
Bulletins include messages about status updates of user feedback and other push notifications from Abseco.
You can enable the do-not-disturb function for a specified period by performing the following steps:
Tap Do-Not-Disturb Schedule on the Notification Settings page to go to the Add schedule page. If you enable this function for the first time, tap Do-Not-Disturb Device and select the devices for which you want to disable the notification function.
Tap the < icon in the top left corner to go back to the Add schedule page. On the Add Schedule page, set the repetition mode, specify a period of time, and tap Save in the top right corner. Then, the Do-Not-Disturb Schedule page appears. Enable the Do-Not-Disturb Schedule on this page.
To add another do-not-disturb schedule, tap Add schedule on the Do-Not-Disturb Schedule page. Set the repetition mode, specify desired devices and a period of time, and tap Save in the top right corner.
Notification settings
You can use one of the following two methods to go to the Notification Settings page:
On the Me page, tap the settings icon in the top right corner. On the Settings page, tap App Notification.
On the Me page, tap Message Center to go to the message center. Tap the settings icon in the top right corner.
If you turn off the Enable Notifications switch, you will not receive messages in the Alarm, Home, and Bulletin categories. If you turn on the Enable Notifications switch, you can separately specify whether to receive Alarm, Home, and Bulletin messages.
FAQ & feedback
To view FAQs or send feedback to Abseco, go to the Me page and tap FAQ & Feedback to go to the FAQs & Feedback page.
To view Abseco's responses to your feedback, tap My feedback in the top right corner.
In the FAQ section, you can view the FAQ that you may encounter during your use of the app.
In the Most Asked section, you can filter FAQ by device, device networking issue, app use issue, and third-party control issue.
To report an issue, tap Report Issue at the bottom of the FAQs & Feedback page. When you report an issue, you need to enter your issue and your contact information, specify the issue type and the time when the issue occurred, and upload related images.
You can also enter keywords in the search box to search for solutions to your problem.
About
To rate the app in the app store, tap Rate Us.
To learn more about Abseco, tap About Abseco to visit the Abseco official website.
To learn about the privacy policies of Abseco, tap Privacy Policy.
To learn about the user agreement, tap User Agreement.
To check the current version of the app, view version No. in the Current Version section.
Account
You can view your account information and change the profile photo, nickname, temperature scale, and time zone on the Account page. To go to the Account page, tap your profile photo on the Me page.
You can tap Account and Security on the Account page to go to the Account and Security page, where you can change your login password, set a gesture password, or delete your account.
Delete account
To delete your account, perform the following steps:
Tap your profile photo on the Me page. On the Account page, tap Account and Security.
On the Account and Security page, tap Delete Account. On the confirmation page that appears, tap Confirm. On the page that appears, tap Get Verification Code to obtain a verification code. Enter the verification code that you receive. On the page that appears, tap Delete.
Note:Your account will be deleted after seven days, and any data related to your account is also deleted.
If you log in to the app with your account within seven days after you complete the preceding steps, account deletion is terminated.